
Welcome back to our monthly spotlight series, where we discuss Star Wars costumers who have ‘gone the distance’ and put in the effort to create solid, in-universe outfits or personas. This is the second half of our two-part interview with Colin Adams, and after digging deep into the design stages in last month’s entry, we’re ready to follow along as he starts his actual build process!

When first considering this project, Colin said he knew how to sew “at a moderate level”, and knew there were other folks who made custom Mando-style flightsuits. However, he also knew that if he was able to attempt this and succeed at it, not only could he learn some new skills, but he would also be able to alter and tailor it himself! I’ve always been a big fan of Lev Vygotsky’s ‘ZPD’ theory when applied to reenacting-crafting, and it helps to choose projects which not only build on one’s existing skills but which can help push them to the next level – but not to bite off something completely outside your existing skillset! If you’ve never touched a needle and thread before, sewing something as complex as a screen-quality flightsuit for your first project would likely result in you getting frustrated and giving up. There are no ‘skip three levels ahead’ cheat codes IRL, so it pays to work smart, start small, and build on what you already know! Looking back on his project, Colin said that while things like setting a zipper fly were so much more complex than they seemed at first, “I feel like I leveled up two levels doing this suit: it really came out great and fits me perfectly.”
Colin’s flightsuit pattern came highly recommended from JustDesignsNorway on Etsy. He had to look around for a bit for the three colors of fabrics he needed for its various components, and finally found them in a heavy-duty ‘duck cloth’ cotton canvas—when you want to do Star Wars right, natural-fiber fabrics are the way to go! With a project this big, it helped to have a good amount of time to set aside and devote to it, so Colin began this undertaking during the winter months when it was too rainy to paint other projects. All the elements are canvas, except for the flak jacket’s quilted shoulder areas, which are from an extra-thin hide of glove leather which Colin found (“for like $10!”) and dyed darker brown–because when the goal is to follow the galactic aesthetic as accurately as possible, bright red leather on an otherwise muted kit is going to stick out like a sore thumb.

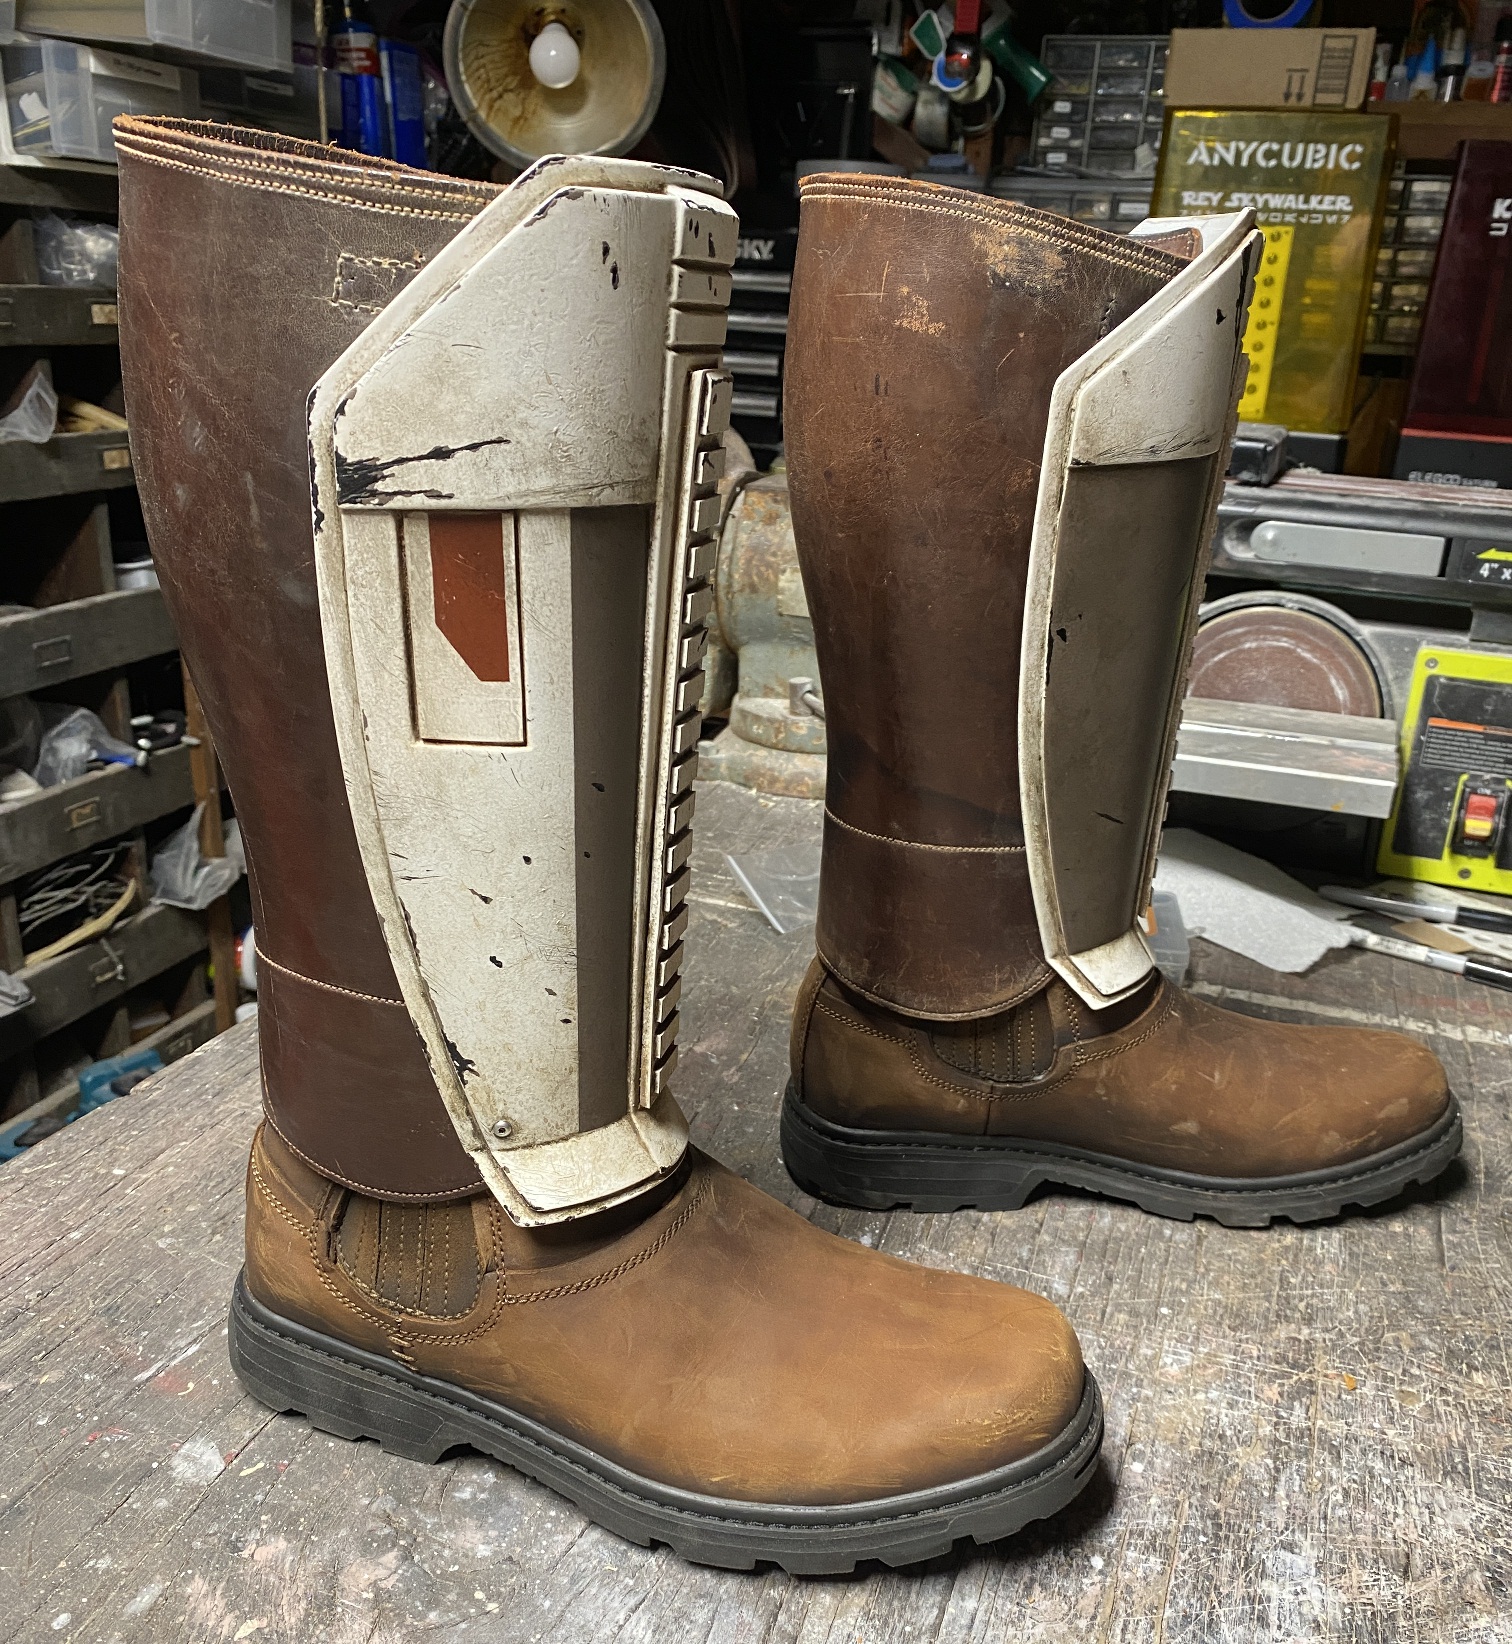
Colin’s soft kit has a lot of layers, with some quilting, tricky angled seams, and lots of topstitching all over the whole thing; the topstiching on the sleeves is inspired by Din Jarin’s general style, but Colin designed some different patterns to help differentiate them. Despite a lot of these beautiful details getting eventually covered by armor, it is clear that everything was done with precision and care, and having those angled panels and topstitching all peeking out at the sides really adds to the look and helps imply a complex, layered flightsuit.
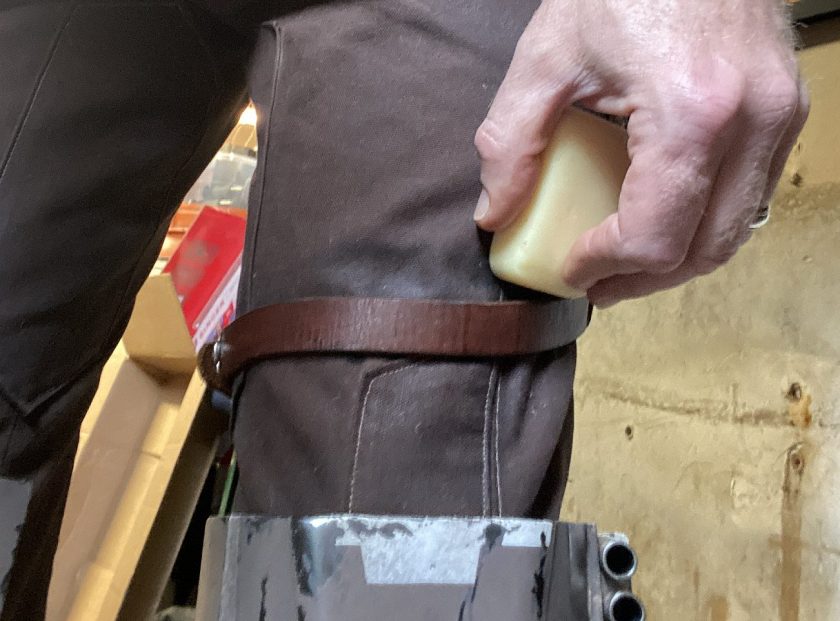
All of this kit’s belts and pouches were made by Colin as well. He told me he has a lot more experience with stitching leather by hand, so it was only natural that he would make pouches and holders for many of this kit’s props, like the datapad and ‘data spike’. Since leatherworking was the easy part for him, Colin really looked forward to designing the various custom pouches. (While most of my work these days is in textiles, there really is just something so meditative and satisfying about stitching leather by hand that I don’t get with a sewing machine or endlessly Bondo’ing and sanding hard props).

Also, the way the smaller carriers use brass studs helps underline the old-school military aesthetic of the GFFA
To the first-time GFFA creator, it can feel so backwards to spend so much time making a thing, only to seemingly abuse it by tearing it up, or covering it in gunk or dirt or grease. But as evidenced by Colin’s phenomenal weathering of this kit, there’s really no other way to authentically get the ‘Star Wars look’ – as weathering-averse folks love to point out, yes, “everything was new once”, but from the beginning, the GFFA has always been a ‘lived universe’, so shying away from a healthy dose of aging and weathering will result in your product looking…’off’.

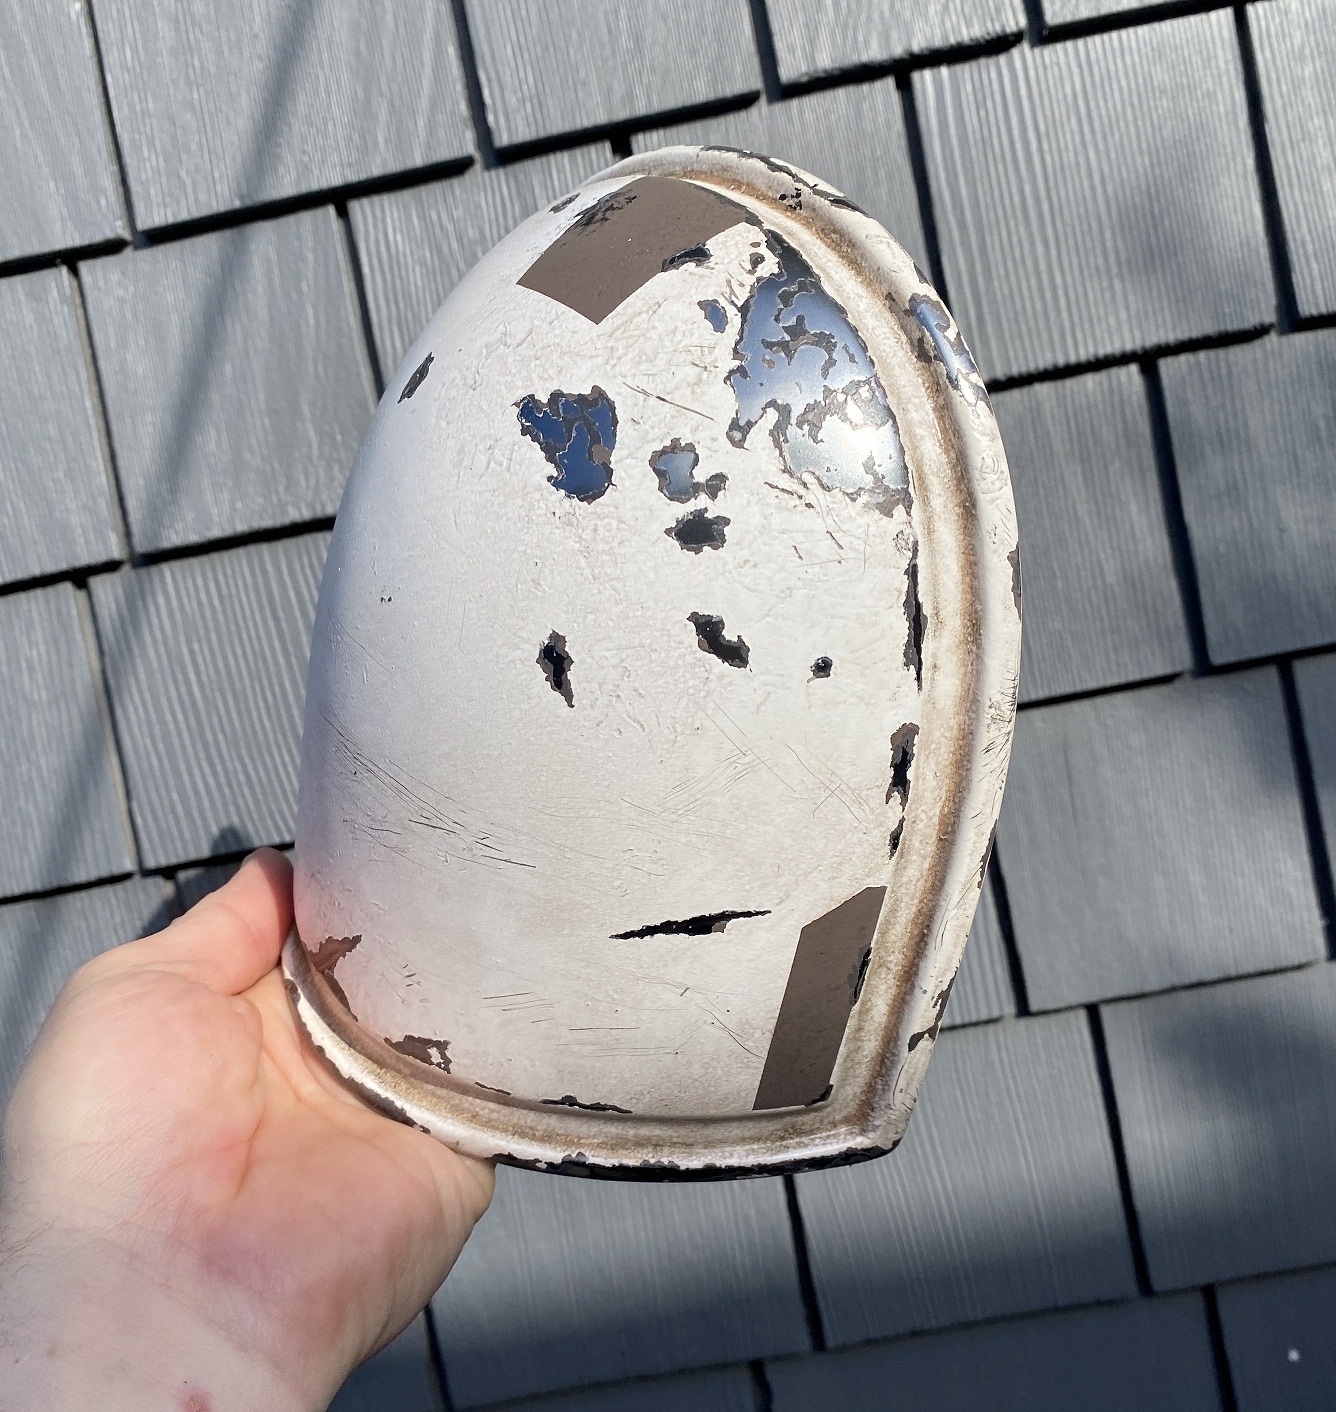
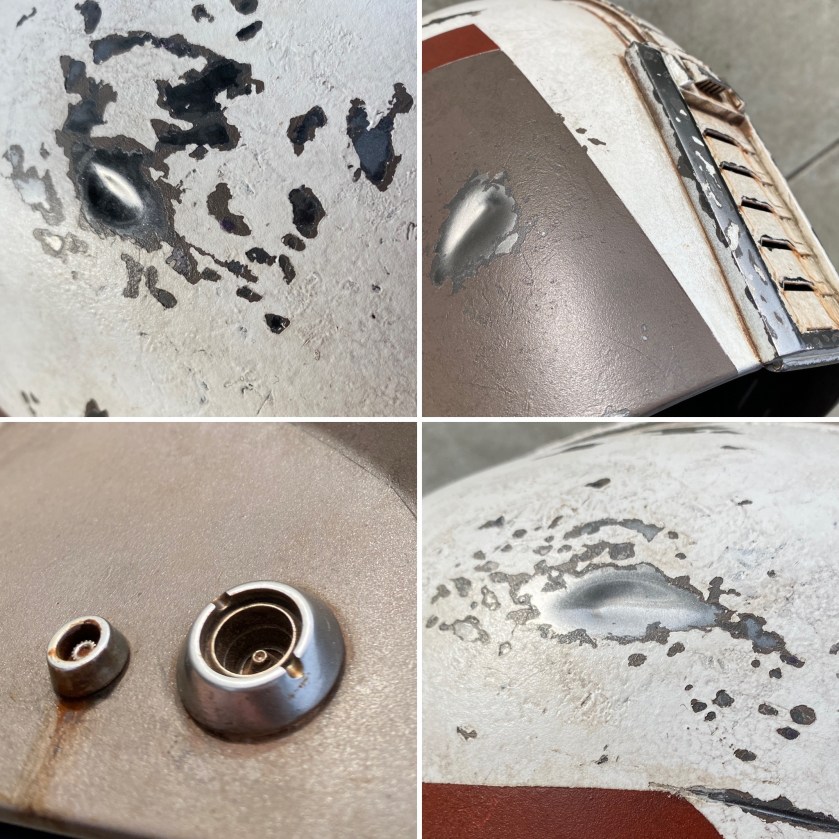
If you haven’t seen them already, Colin has produced an excellent series of tutorials on both the theory behind prop weathering and its execution. But to summarize: his usual process is to add some physical weathering (like creating actual dents and dings in a piece) before priming, and following this with a 2K gloss-coated metallic layer for a base. Over this, he uses latex masking fluid (I’m still a stubborn fan of good ol’ yellow mustard) and salt to mask out the damage, expanding out just a bit for each layer of paint, in order to get chips through to the metal base. He also gives the paint texture in spots using the ‘tape-ball’ technique. Once everything is (spray) painted, it’s time for more weathering via black- or brown-washing with acrylics, before finishing some spots with Fuller’s earth powders. This particular suit was where Colin said he first tried the ‘Copic ink speckle’ method, which is absolutely magic (both to watch and for the immediate effectiveness of it).

For the softer parts, Colin used a combination of sandpaper scuffing, watered-down acrylics, light airbrushing, fuller’s earth dusting, and ‘otter wax’ to create oily spots. Again, whether it’s hard elements or soft parts, weathering should be very intentional. Once you understand the theory behind it, it’s always very obvious when someone hasn’t put much thought into their weathering and just torn holes in random places or masked off big old ‘leopard spots’ all over their armor, so it pays to really think about the areas that are most likely to get wear and tear. Take your time, and build up layers little by little – things don’t normally get distressed all in one go, and what weathering is really trying to do is show create the wear-and-tear of a long period, just through artificial means and over a short period.
When I asked him about upgrades, Colin said that when he submitted this kit to the Mandalorian Mercs Costume Club’s approval team he received a list of nine items to be fixed. Most of these involved the back, which (because it had two back zippers), he could never see until it was all on for the photos. To give the illusion of a single garment, the top of the flightsuit needed to end at the belt, so several of the fixes were to address that. Most of the main armor was good as-is, and with his changes made to satisfy the MMCC, Colin’s next goal is to create a custom transport container which he usually makes for all of his costumes when they are complete. However, as he says, “I get the impression that part of the fun of a custom Mandalorian is that you can slowly make extra parts to swap in, and that sounds like something I will definitely do!” We look forward to seeing this kit’s evolution!

I try not to compare my own glacial crafting speed to that of others, but when you see someone like Colin whose output is so impressive, it’s usually the result of some intentional method. In terms of completion timeline, Colin said he first printed this suit’s knee armor in mid-December 2022, and made the last few fixes in July 2023. I learned that Colin takes an deliberate and methodical approach to his crafting: he sets aside an hour each morning to work on projects, and by working consistently in this way he gets a lot done over time in small, steady steps. (I, on the other hand, typically have like, three or four projects in-progress at any one time, and tend to bounce around between these and work on each in short, intense bursts. Lately, I’ve been trying to get better and challenging myself to finish one project before I get to move to the next, and hopefully I’ll be able to share some of these on the blog before too long 🙂
So, there we go! Incredible kits like this one don’t just happen – they’re the result of intentional thought, research, the courage to take on a challenge, and a fair amount of perseverance. You can see more of Colin’s insane craftsmanship and attention to detail (and why wouldn’t you, really?) on Instagram and on YouTube, where he shares his crafting know-how in several excellent video tutorials.
I’m always on the lookout for future interviewees, so if you know a high-quality costumer you would like to nominate for this series, please get in touch below or come let us know at the Star Wars Living History facebook community. See you next month!
(Special thanks to my monthly supporters P.D. and R.F.! Between all my other ventures, finding time and energy to work on this site is tough, so if you’ve enjoyed reading, have learned something from this post, or will use Colin’s kit as inspiration for your own outfit, please consider supporting my work via ko-fi, or with a small donation below! Thank you!
Make a one-time donation
Make a monthly donation
Choose an amount (US dollars only – unfortunately, I cannot currently accept Republic credits 😉
Your contribution is greatly appreciated and will help me continue to bring you high-quality content!
Your contribution is greatly appreciated and will help me continue to bring you high-quality content!
