Welcome back to our monthly spotlight series! In this feature, we talk with Star Wars costumers who help illustrate what high-quality, in-universe costuming looks like, and provide some insights into their character creations!
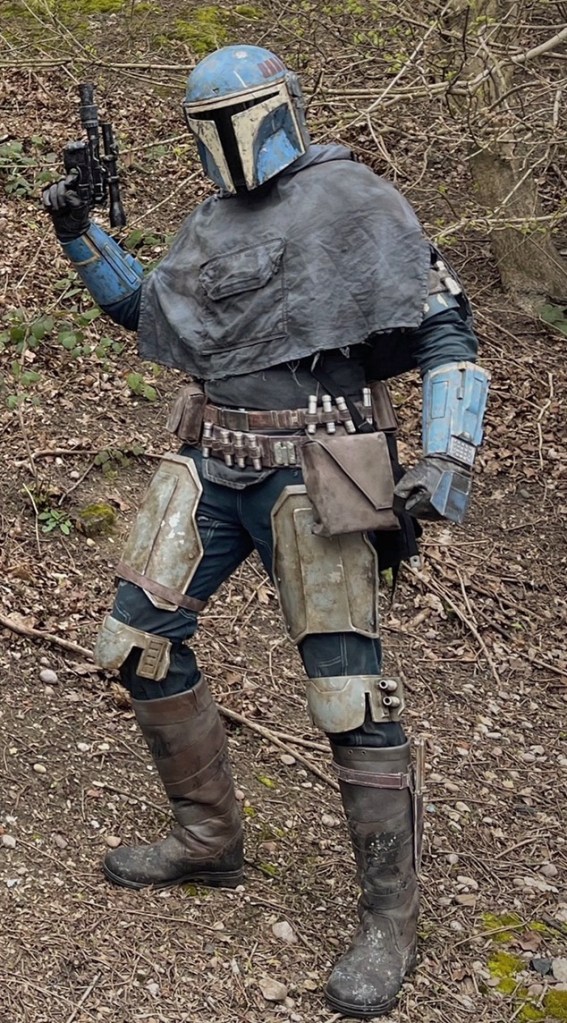
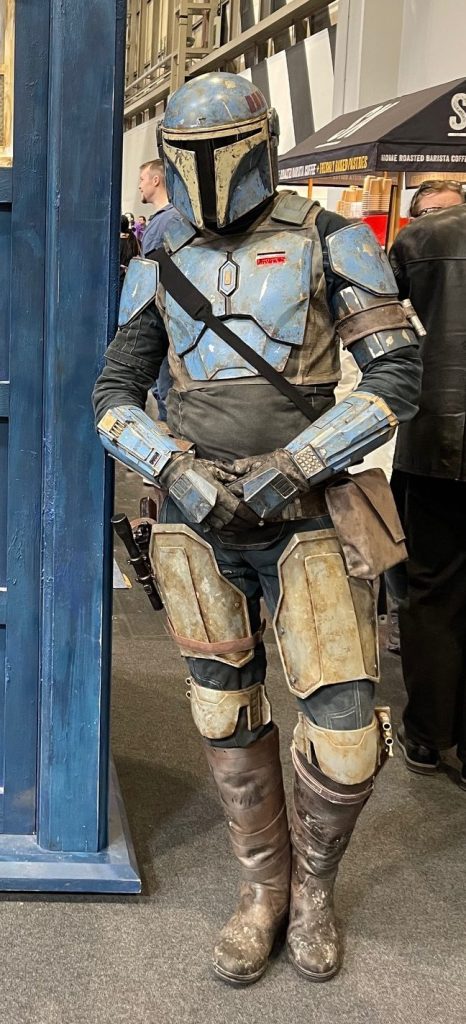
This time around, we’re looking at ‘Buck’ and his excellent custom Mandalorian kit!

Buck told me that his original inspiration for this outfit were the blue tones of Jango Fett and the Death Watch, with the hooded poncho coming from Bo Katan and the Nite Owls’ appearance in Season 7 of The Clone Wars.
When designing this kit, Buck referred to the excellent work of Brian Matyas (concept artist for The Mandalorian) to get the general aesthetic. As Matyas has a rock-solid grasp on what authentic Star Wars looks like, you’ll see no garish colors or high-contrast custom Mandos here!
Buck 3D modeled most of the armour, which was 3D printed, followed by “many, many hours” filling and sanding to get the hallowed completely smooth set of armour, before going to town painting and weathering it all.

While he says he’s never considered creating a backstory for this impression, hetold me that the Mandalorian is definitely located in the post-Imperial period.
For the fellow textile nerds, Buck’s kit breaks down as follows:
The outfit began as a “cheap-ish” Mandalorian costume, which came with “awful vinyl armour” sewn on. However, the flight suit top and bottoms were decent quality for a base, so he wielded the mighty seam ripper to remove the vinyl “armor”. The flak vest to which the hard armor is attached was made from scratch using cotton canvas, as was the poncho [using woven, natural-fiber fabrics is key to the authentic GFFA ‘look’!]. The armor is mostly PLA (3D printed), though some pieces (like gauntlets and hand plates) are resin printed (= less sanding!!) All the armor pieces were painted using Molotow Premium spray paint. The boots came from Amazon and were heavily weathered to get them looking dirty and beat up. The belts were also sourced from Amazon; the upper belt is just a simple sliding buckle belt, and the bottom belt a cheap Boba Fett belt which came with “pretty decent pouches”. The ammo cylinders were machined aluminum from the UK-based JJ Industries; their loops are actually sewn out of faux leather.
When it came time to weather his kit to give it the authentic Star Wars ‘used universe’ look, Buck used his full bag of tricks. The flightsuit had holes poked in it and the edges cut with scissors, then it was thrown in the washer to fray the damage and make it look more natural. He then laid it outside and applied a light mist of beige and dark brown spray paint to give a dirty look. The leather parts were hand-painted with acrylics, plus some sandpapering on his boots to rough them up.
In thinking about future upgrades or changes, Buck says his helmet needs some reworking, as it’s currently a little too tall and he has to tilt his head down to see most of the time. He also plans to use a darker blue on the armour and perhaps tone down the weathering some – although I don’t think it’s necessary. To my eyes, the weathering is perfect, but I realize that oftentimes what looks heavily weathered in person often doesn’t show up in photos.
If he were to use this impression to teach on a topic via ‘living history’, Buck says it would probably be something stealth-related, as his Mando kit was originally conceived as a ‘covert’ dweller.
If you’d like to see more of his work, Buck can be found on instagram at Buck the Mando, and he sells 3D files on his Etsy shop. If there’s a Star Wars costumer you’d like to nominate for inclusion in this series, leave a comment below, or come discuss with us at the SWLH facebook group! See you next time!
Interviewing, compiling, and writing this site takes a lot of time and energy. If you’ve enjoyed reading or this post has inspired an impression of your own, please consider supporting my work with a small donation below! Thank you!
Make a one-time donation
Make a monthly donation
Choose an amount (US dollars only – unfortunately, I cannot currently accept Republic credits 😉
Your contribution is greatly appreciated and will help me continue to keep this blog ad-free!
(Alternately, you can support my work via ko-fi as well.)
Your contribution is greatly appreciated and will help me continue to keep this blog ad-free!
(Alternately, you can support my work via ko-fi as well.)
