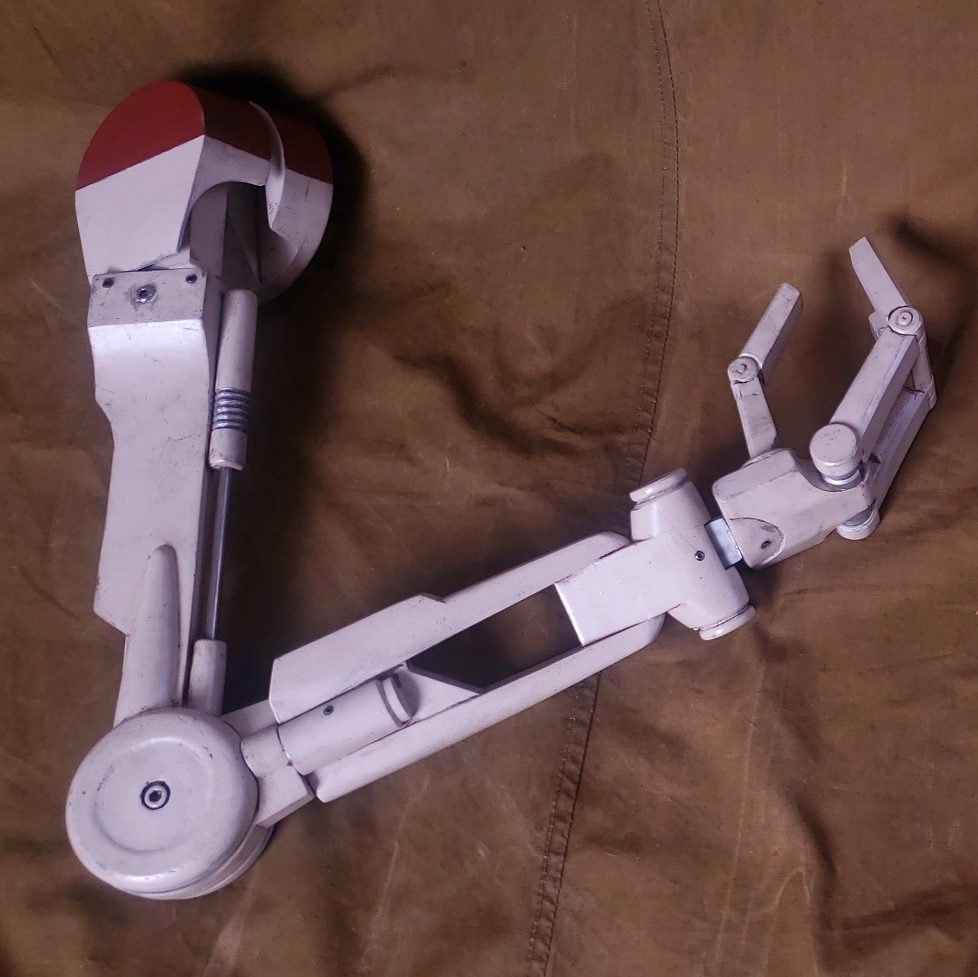
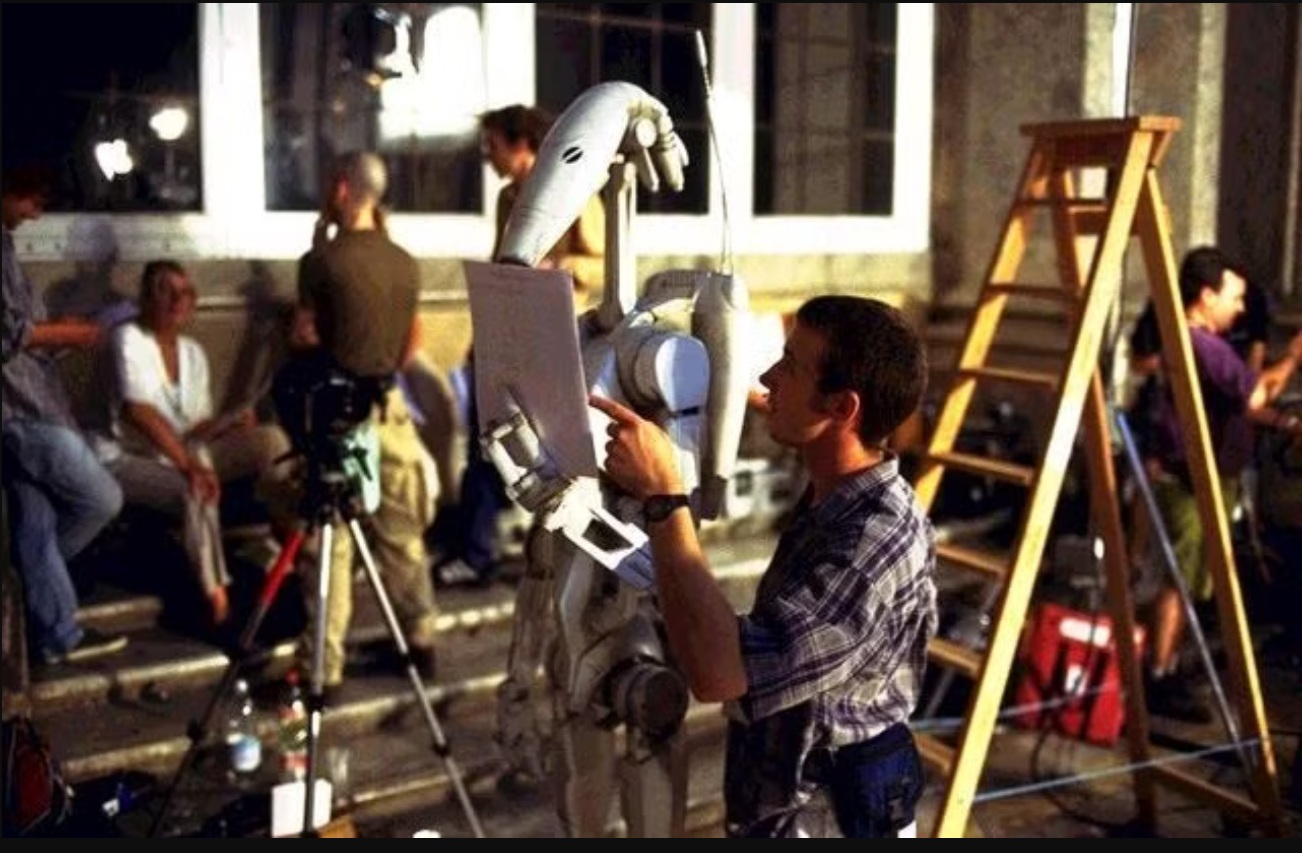
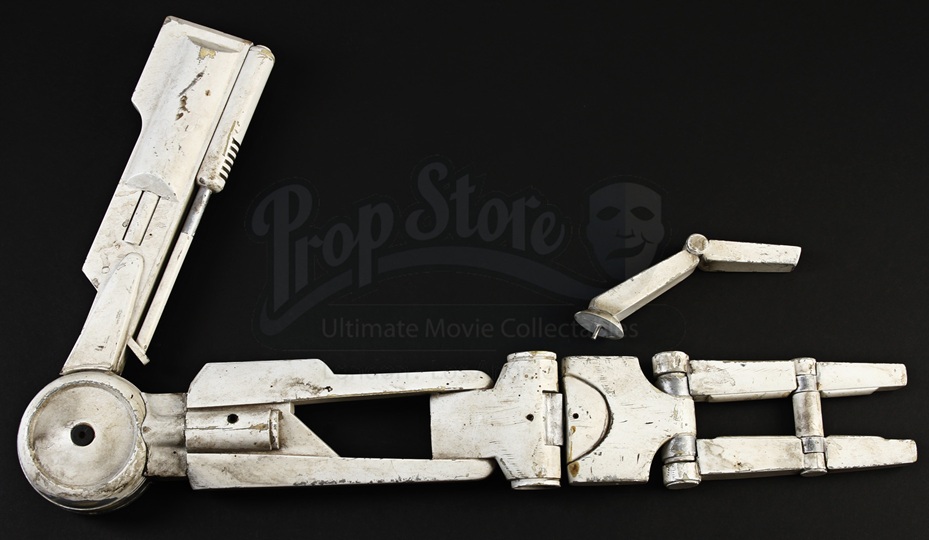
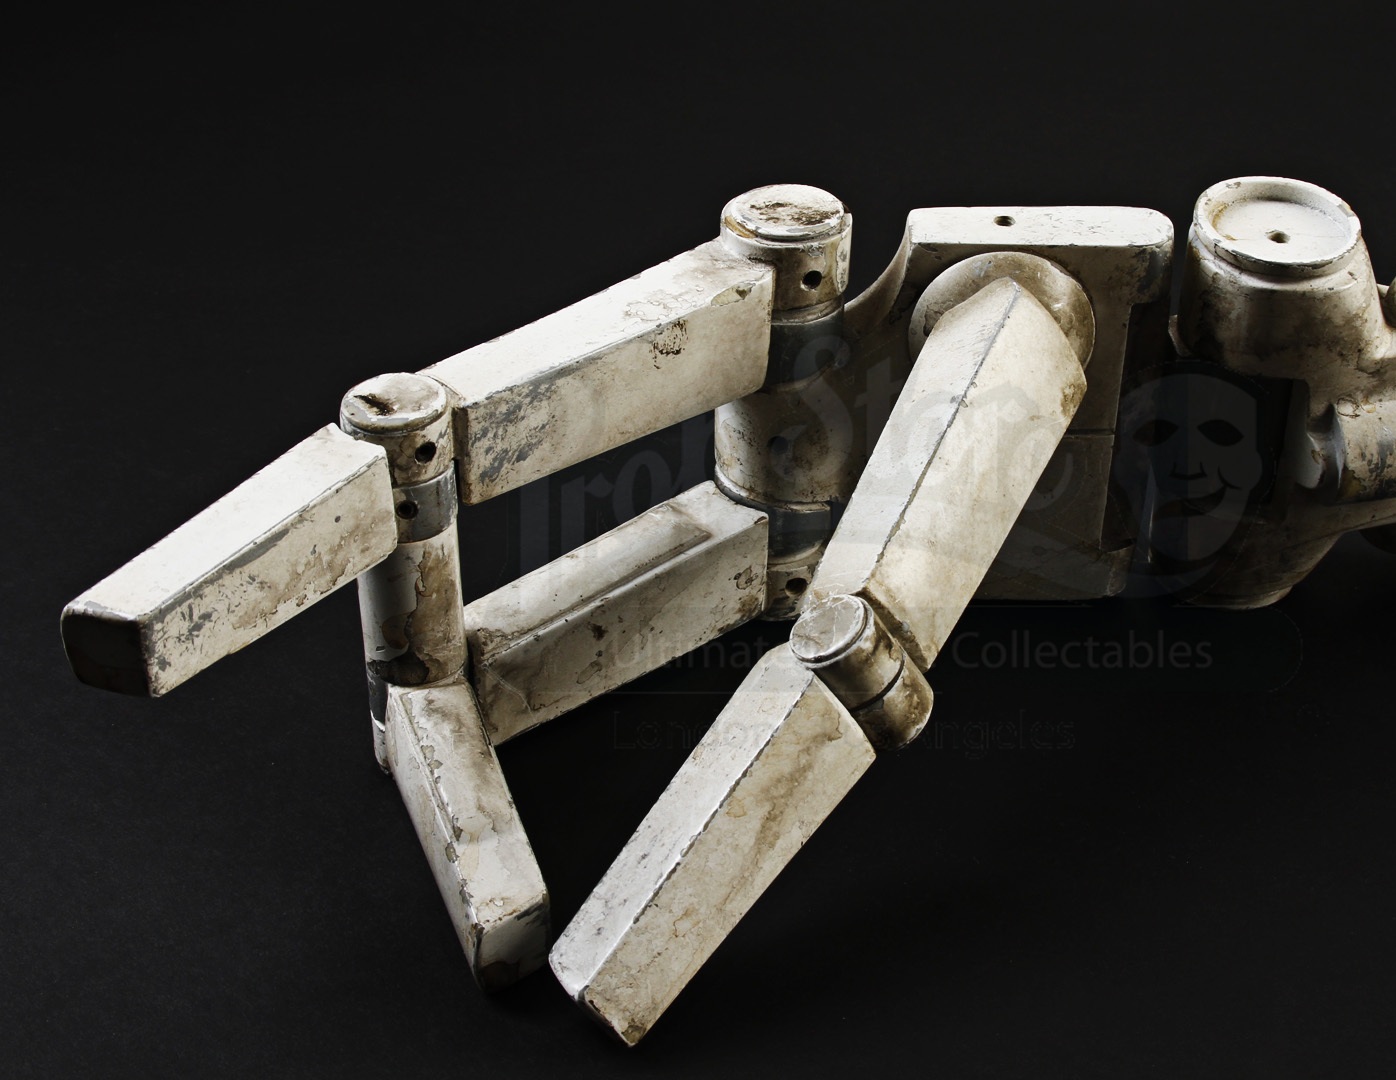
Diamonds in the Rough – Colin “OddViking” Adams (part 2)

Welcome back to our monthly spotlight series, where we discuss Star Wars costumers who have ‘gone the distance’ and put in the effort to create solid, in-universe outfits or personas. This is the second half of our two-part interview with Colin Adams, and after digging deep into the design stages in last month’s entry, we’re ready to follow along as he starts his actual build process!

When first considering this project, Colin said he knew how to sew “at a moderate level”, and knew there were other folks who made custom Mando-style flightsuits. However, he also knew that if he was able to attempt this and succeed at it, not only could he learn some new skills, but he would also be able to alter and tailor it himself! I’ve always been a big fan of Lev Vygotsky’s ‘ZPD’ theory when applied to reenacting-crafting, and it helps to choose projects which not only build on one’s existing skills but which can help push them to the next level – but not to bite off something completely outside your existing skillset! If you’ve never touched a needle and thread before, sewing something as complex as a screen-quality flightsuit for your first project would likely result in you getting frustrated and giving up. There are no ‘skip three levels ahead’ cheat codes IRL, so it pays to work smart, start small, and build on what you already know! Looking back on his project, Colin said that while things like setting a zipper fly were so much more complex than they seemed at first, “I feel like I leveled up two levels doing this suit: it really came out great and fits me perfectly.”

the secrets of authentic Star Warsy crafting continue…

Diamonds in the Rough – Colin “OddViking” Adams (part 1)

Welcome back to our monthly spotlight series, where we discuss Star Wars costumers who have ‘gone the distance’ and put in the effort to create solid, in-universe outfits or personas. This is actually the first half of a two-parter, because our subject has gone so totally above and beyond and built an incredible kit with tons of details that spreading it out over two months is the only way to really do it justice!

If you’ve spent any time exploring Star Wars content on Instagram in the last several years, chances are you’ve seen Colin Adams’ incredible work before. As a professional graphic designer/illustrator, Colin has a very large bag of tools to draw from, and puts them all to good use with a number of impressive cosplays and kits, each fully-detailed and seamlessly dropped into immersive settings with the magic of Photoshop. At the beginning of this year, when I saw Colin was starting a custom Mandalorian build, I knew the final result would be amazing. As we’ve discussed previously in our First Steps series, one of the keys to successfully creating an effective GFFA character is to dedicate time at the beginning of the process to doing your research and really nailing down what the ‘outer persona’ should look like.

creating this incredible mando kit, step by step

Project: Thermal Detonator facelift

In the course of my research on real-world historical partizan kits, I’ve found the most common items carried by WW2 guerrillas are binoculars, grenades, and knives or bayonets. Since I’m always trying to improve my Rebel partizan impression, I thought having a bit of ‘personal artillery’ (Rebel Alliance Sourcebook, p100) would be a fun way to add some authentic weight to a vest pocket, giving a better living-history understanding of what it would feel like to be equipped in-universe.  Around the same time, KR Sabers released an all-metal thermal detonator kit. It was a thing of beauty…but it also cost $200+…and I simply could not justify spending that much on something that was just for looking shiny on a display table or taking up space in a pocket. (Plus, for some reason, high-end propmakers always insist on including things like explosions or character voice soundclips in their electronics, which actually decreases the immersion for me. Anyone else feel the same way? Leave a comment and let me know your thoughts!). Since I couldn’t justify the cost for something that didn’t do anything besides look cool and flash lights, how could I add some authenticity to my kit without breaking the bank?

Continue reading “Project: Thermal Detonator facelift”

A295 rifle conversion update 3

The pandemic project saga continues! Last time I checked in, I was stuck at bottlenecks on the remaining stock, scope, and magazine fronts that kept me from proceeding, but after my usual lull, I again have something worth sharing!

-the StG’s wooden stock needed to be replaced with a metal ‘T’ stock; and as my potential welding instructor is in the COVID high-risk category, I outsourced this element to a machinist friend of mine.

Continue reading “A295 rifle conversion update 3”

Project: B1 battle droid arm (part 2)

Just in time for Halloween, I’m proud to finally be able to show off a project that’s downright skeletal!:

20201011

When we last checked in, my battle droid arm project had been printed, resin-filled, cleaned up and given a base coat of paint. Next came the fun part: assembly! To allow them the proper range of motion, the hand and forearm joints were articulated with turned pins and set screws, as it appears the original was made (although I have not yet added the tiny set screws in the fingers; my thumb can do more than just rotate in a circle, as it has an actual captive ball-and-socket):

As you can see, I really need to add some extra-grungy finger grime!

To really sell the artifact as a battlefield relic, I originally wanted to include some cables or wires poking out of the top of the shoulder, but my research turned up the surprising conclusion that such details wouldn’t be necessary.

Continue reading “Project: B1 battle droid arm (part 2)”

Project: B1 battle droid arm (part 1)

In the last several years of browsing Star Wars crafting topics on social media, I’ve determined that about 95% of replicas (especially 3D-printed ones) I’ve seen are of weapons, helmets, and armor associated with a tiny range of recognizable-to-the-public Face Characters or nameless Troopers. You will almost never see mundane artifacts replicated in the prop-building community…as one RPF user asked while seeking info on how to replicate a Kloo horn, “Anyone have any ideas or did nobody ever care because it’s not a lightsaber?”

As I was brainstorming my NRAC (New Republic Archeological Corps) persona last year, I began thinking about what kinds of artifacts I could potentially show off at a convention booth, hands-on interpretive historical talk, or similar venue/event. With Naboo’s focus on arts and learning, and the presence of a notable institution of higher education (Theed University—which coincidentally has the same initials as my alma mater), I felt confident in basing my NRAC impression on a Naboo background. I then began thinking what kinds of items would likely be collected or excavated by a Naboo archeological student, or possibly artifacts that could’ve been passed down through the family.
Around the same time, I saw someone online post pictures of a 1:1 3D-printed B1 battle droid:B1 il_794xN1521245503_mg8s.jpg
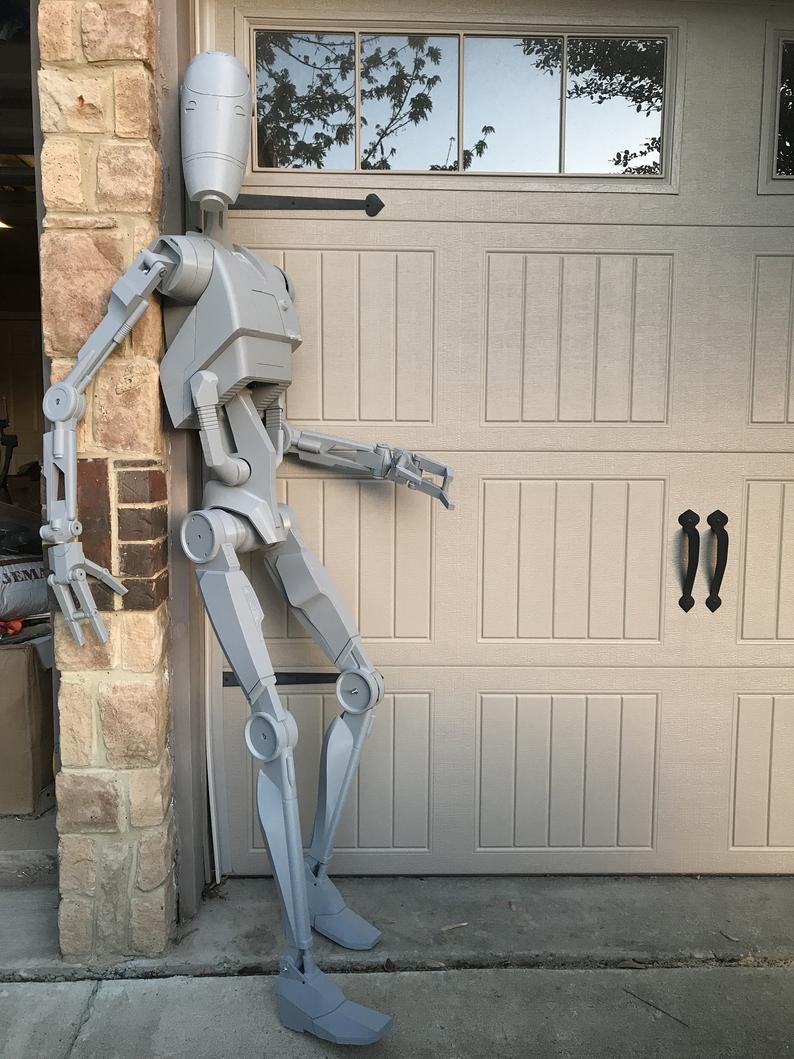
‘Wow!’ I thought, ‘that would be amazing to display!’ Unfortunately, I was also living in a very small apartment at the time, and there was no way I had the space to store an almost-2-meter-tall figure I might use for a handful of events each year (if I was lucky!). Also, in terms of realism, what are the odds that my archeologist persona would have a complete B1 droid?
‘Okay’, I said. ‘How about just, like, an…arm?’ Continue reading “Project: B1 battle droid arm (part 1)”

An authentic Medpac at long last!

In the spirit of my New Year, New Gear tradition, I recently finished up an essential piece of my in-universe survival/hiking kit.  Some 20 months ago, I made a discovery – I noticed that the health powerups in Jedi Outcast and Jedi Academy were essentially the same design as one from an early SWRPG sourcebook:

a bit of digging turned up similar designs in the Essential Guide to Weapons and Technology and the more recent SWRPG Revised Core Rulebook (2002):

As my backpack’s current first aid kit has been stashed in a repurposed extension cord waterproof safety box, I’ve been thinking about what I could use as a container for my medical supplies that would better fit the in-universe aesthetic. Continue reading “An authentic Medpac at long last!”