
Hello there! Welcome back to my buildlog for recreating an N1 starfighter helmet – let’s not waste any time and get straight into the process!
In my last post I determined how big the components of the helmet would be, and decided on a method for construction (Pepakura). While I originally wanted to make all parts of the helmet using Pep, I decided that the Y-shaped-part-that-holds-the-earmuff was complicated enough that I should make them out of something more substantial.

I first considered making a mold and casting them in resin, and when I want to feel like a real prototyper, that means carving a positive from amber ‘victory wax’. Well, after a few days I had built up the shape pretty close – I figured I would cast the pieces fairly roughly, and then do the fine shaping on the casts, since resin doesn’t heat up and deform in-hand. However…
I’d made the shape still far too thicker than it wound up needing to be, and wasted a good bit of plaster trying to pour a two-piece mold (which wound up being too thin because, again, I’d made the shape too chunky). Finally, I decided to simplify and play to my strengths – I could carve the pieces from poplar wood: lightweight but sturdy! This wouldn’t consume large amounts of heavy & expensive resin, wouldn’t require the headache of pouring molds, and I could get better fidelity than if I used straight Pep.

Without a pantograph or milling machine to keep them congruent, I tried to minimize any deviation by screwing the two blocks together and cutting them out as one. By alternately doing each stage of shaping between them (instead of finishing one completely and then starting on the other, I was able to make sure the final product was much more similar. Finishing was pretty standard: primer to show imperfections, then paint, a stippled final coat, and then a satin clear coat to lock everything in.
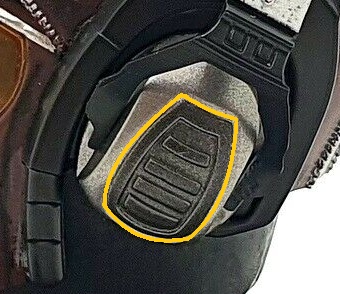
Then, it was time to take on the earmuffs themselves. Now as I said at the beginning, the 3M #1450 earmuff used is no longer available, but I was able to identify an identical in-production model made by MSA and buy a pair via Amazon. The earmuff itself appears to be unmodified aside from the addition of a low-profile detail panel added in the center:
Again, wanting to feel like a proper prototyper I rolled out some sheets of Victory wax and got to scratchbuilding; a few hours’ careful carving had the shape in hand:

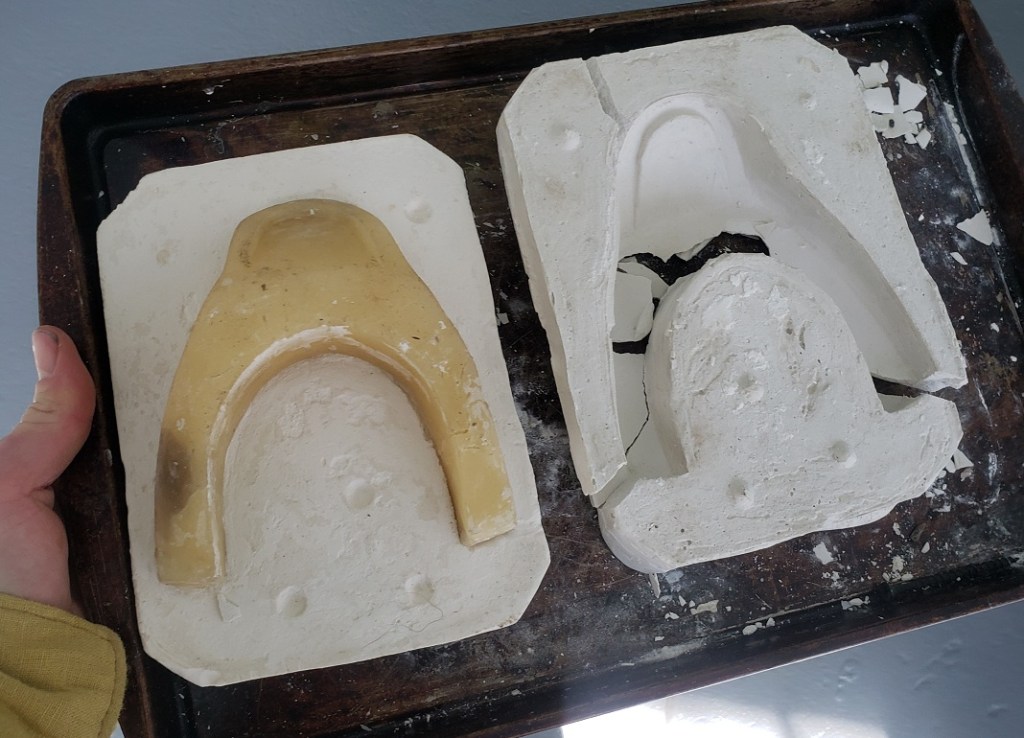
Since I don’t expect to have a ton of folks lining up to buy these pieces*, was low on silicone, and just needed the two panels, I opted to use Plaster of Paris for my molds.

Unfortunately, as I’ve discovered the last few times I’ve used it, my standard release agent (Vaseline) doesn’t seem to be like working with plaster…it tends to soak in and not release effectively, which usually results in the resin cast taking chunks of the mold with it when removed. I would love to hear what releases you all use that might work better!
Anyway, I eventually got two panels cast and cleaned up and ready for gluing to the earmuff:


*(Now that I think about it, these panels would be easy to glue onto any pair of earmuffs to add a little bit of subtle GFFA style….let me know if you’d be interested and I can make a true reusable mold!)
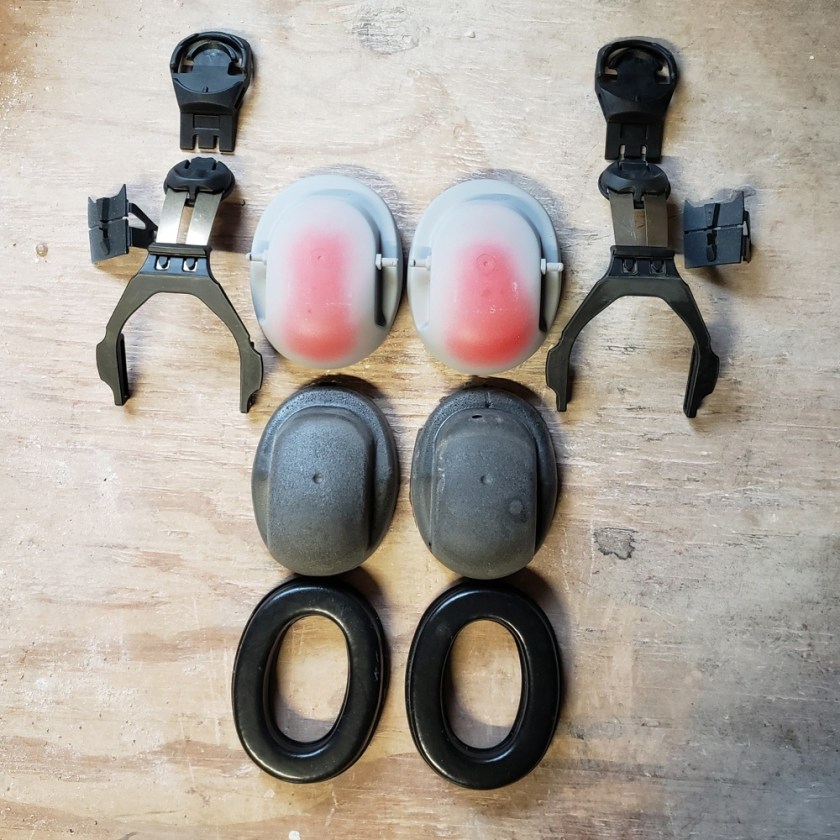
After this, it was pretty straightforward to remove logos and words from all the earmuff system components before getting ready for paint. The coolest thing about this system is that, as you can see, the whole thing can be disassembled, which meant I didn’t have to mask off any of the parts that needed painting, or worry about spray paint melting the foam insulation, or anything like that.
The ear panels were glued on with E6000 for a little vibration protection and the gaps around the edges filled with two-part epoxy (mixed with silver mica powder for color matching). After some filing to smooth everything out, it was time for paint!

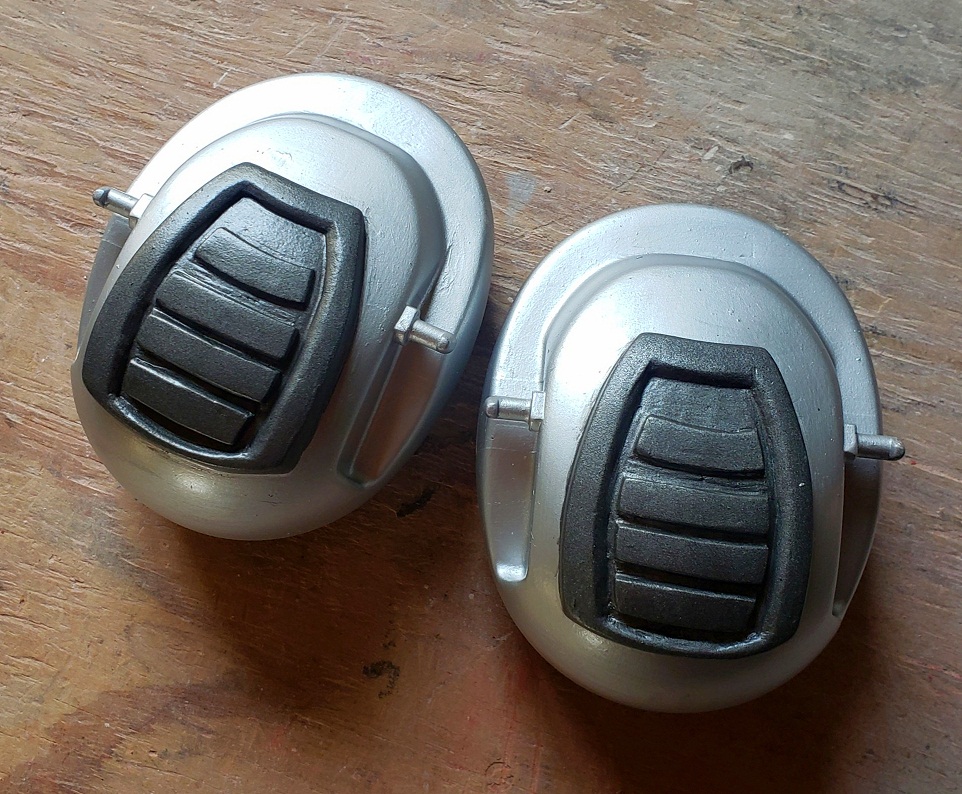
So there -side pieces and earmuff parts completed! Stick around for part three and the most exciting part of the helmet build – making the helmet body itself using Pepakura. See you then!
Researching, crafting, photographing, and writing this site takes a lot of time and energy. If you’ve enjoyed reading or have learned something from this project, please consider supporting my work with a small donation below! Thank you!
Make a one-time donation
Make a monthly donation
Choose an amount (US dollars only – unfortunately, I cannot currently accept Republic credits 😉
Your contribution is greatly appreciated and will help me continue to keep this blog ad-free!
(Alternately, you can support my work via ko-fi as well.)
Your contribution is greatly appreciated and will help me continue to keep this blog ad-free!
(Alternately, you can support my work via ko-fi as well.)

You actually revealed that superbly!
LikeLike