
In the course of my research on real-world historical partizan kits, I’ve found the most common items carried by WW2 guerrillas are binoculars, grenades, and knives or bayonets. Since I’m always trying to improve my Rebel partizan impression, I thought having a bit of ‘personal artillery’ (Rebel Alliance Sourcebook, p100) would be a fun way to add some authentic weight to a vest pocket, giving a better living-history understanding of what it would feel like to be equipped in-universe. Around the same time, KR Sabers released an all-metal thermal detonator kit. It was a thing of beauty…but it also cost $200+…and I simply could not justify spending that much on something that was just for looking shiny on a display table or taking up space in a pocket. (Plus, for some reason, high-end propmakers always insist on including things like explosions or character voice soundclips in their electronics, which actually decreases the immersion for me. Anyone else feel the same way? Leave a comment and let me know your thoughts!). Since I couldn’t justify the cost for something that didn’t do anything besides look cool and flash lights, how could I add some authenticity to my kit without breaking the bank?
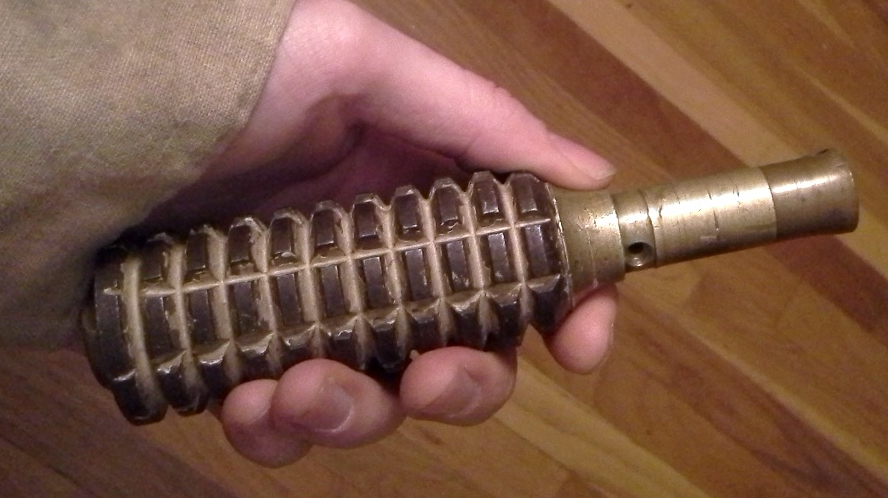
Then, while cleaning out my gear trunk, I came across my original Hales No.3 rifle grenade (destined for a custom hardware saber down the line):

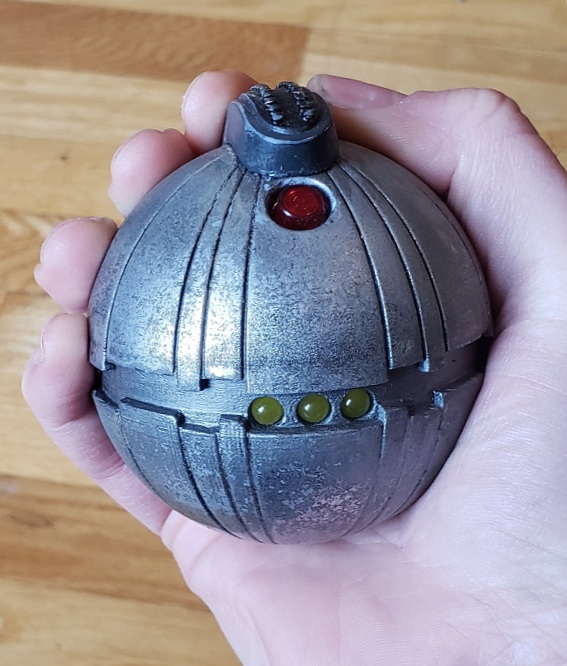
It’s inert, so it’s the real deal and heavy, but doesn’t go boom. ‘Ah-ha!’ I said: ‘what about a training detonator?’ It could still be weighted, but wouldn’t need working electronics! Then, right before Halloween last year, someone came across my facebook feed with a batch of 3D-printed thermal props that looked pretty damn good, had already been sanded and painted with a nice metallic finish, and had a sweet price point ($30)!

When I got one in hand, I noticed that while the silver finish looked great, the ‘weathering’ just looked like brown acrylic had been brushed on, and would need cleaning up. Also, the thumb switch—while articulated—was very tight and needed fine tuning to get it sliding smoothly.
With those issues in mind, I got to work:
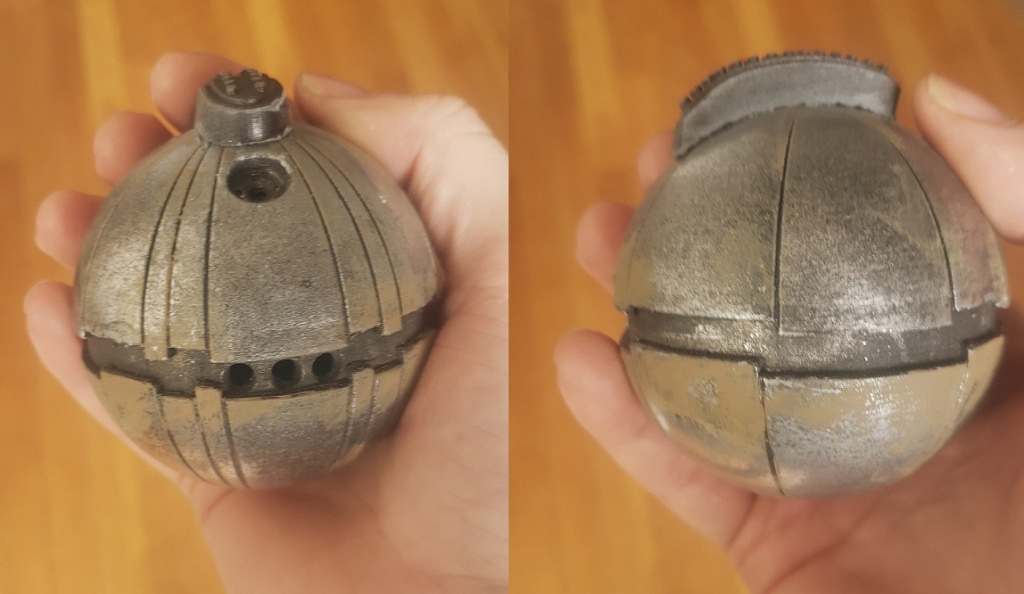
-the two hemispheres had only been friction fit together, so I popped them apart, filed down remaining print lines on the bottom of the ‘teeth’, and filled those in with Testor’s putty.
-popped off the switch, took a needle file to the remaining print lines, and sanded down the moving surfaces
-softened and carefully scraped off the offending brown paint.
-to fill in the empty holes, I tracked down some electronic components (3 LEDs were easy, but the lens cover was a pain to find!…makes me yearn for the days of my local Radio Shack).

-most depictions of your basic Class A thermal det will show them as silver, but if we go back to the source and look at the on-screen prop, you can see it has a slight yellowish tinge. I believe this was due to being a machined brass shell nickel or chrome plated…but I’m pretty stumped how to achieve this look in a plastic prop–any ideas?

Then came the accurate weight. Per the SW RPG Saga Edition Core Rulebook (p127), a thermal detonator weighs one kilogram. I pulled up a table of the density of various metals and divided the 1000 grams of the detonator’s weight by lead’s density (11.3 grams per cubic centimeter); this gave a result of 88.5 cc. Knowing that one cubic centimeter is the same as one milliliter, 88.5 cc works out to be approximately three ounces. I melted up an amount of lead, measured out two portions totalling 3 ounces, and left these to cool in my round ladle.

After drilling and filing out a little space for the lens, thumbswitch, and LED panel, each half was epoxied into its hemisphere shell and everything sealed together.

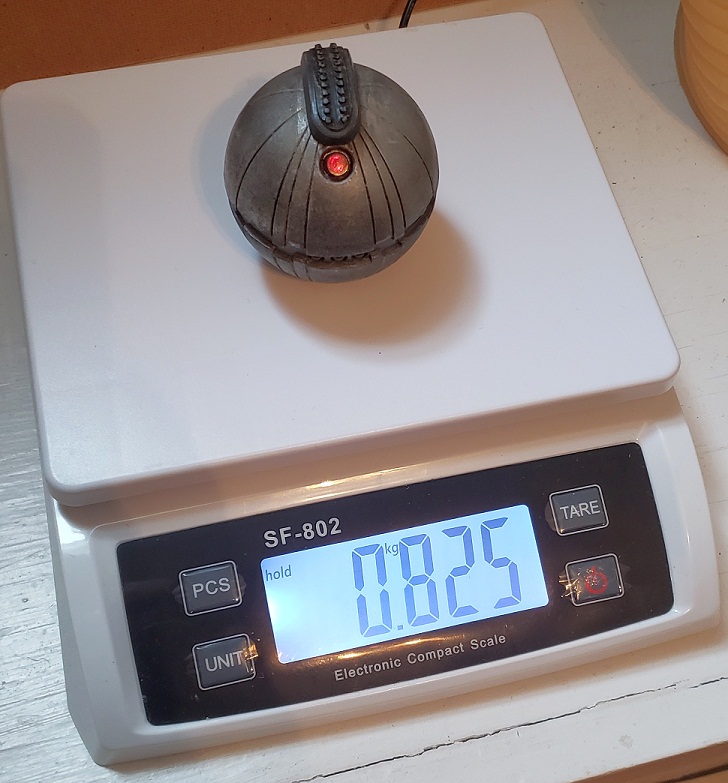
Naturally, when it was time to put it all together, I got ahead of myself and forgot to put everything on my scale before I glued it together. If I’d checked first, I’d have seen that I was 17.5 grams short of a kilo–assuming my cheapo scale is actually accurate, which it very well might not be. Alas for my perfectionist brain…but 82.5% is still plenty heavy and nobody’s going to be weighing this thing if I bust it out in a workshop.
As a finishing touch, I’m considering adding a decal or two to underline the fact that this is meant to be an inert training tool and not a ‘live’ detonator…just in case some kiddo gets ahold of it, thumbs the switch, wonders why it’s not lighting up or counting down, and yells ‘Hey, it’s just a dummy prop!’, ruining the illusion for everyone present. Anyone know if we have any references to in-universe training materiel or have ideas what such a label might say? Let me know in the comments, and I’ll see you next week!
Researching, crafting, photographing, compiling, and writing this site takes a lot of time and energy. If you’ve enjoyed reading, have learned something from this post, or will use it as inspiration for a future project of your own, please consider supporting my work with a small donation below! Thank you!
Make a one-time donation
Make a monthly donation
Choose an amount (US dollars only – unfortunately, I cannot currently accept Republic credits 😉
Your contribution is greatly appreciated and will help me continue to keep this blog ad-free!
(Alternately, you can support my work via ko-fi as well.)
Your contribution is greatly appreciated and will help me continue to keep this blog ad-free!
(Alternately, you can support my work via ko-fi as well.)


2 thoughts on “Project: Thermal Detonator facelift”