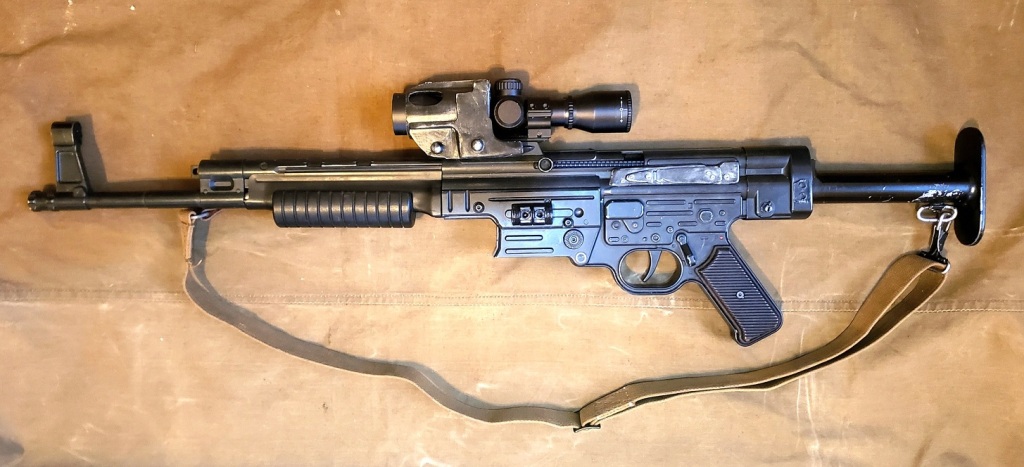
The pandemic project saga continues! Last time I checked in, I was stuck at bottlenecks on the remaining stock, scope, and magazine fronts that kept me from proceeding, but after my usual lull, I again have something worth sharing!
-the StG’s wooden stock needed to be replaced with a metal ‘T’ stock; and as my potential welding instructor is in the COVID high-risk category, I outsourced this element to a machinist friend of mine.
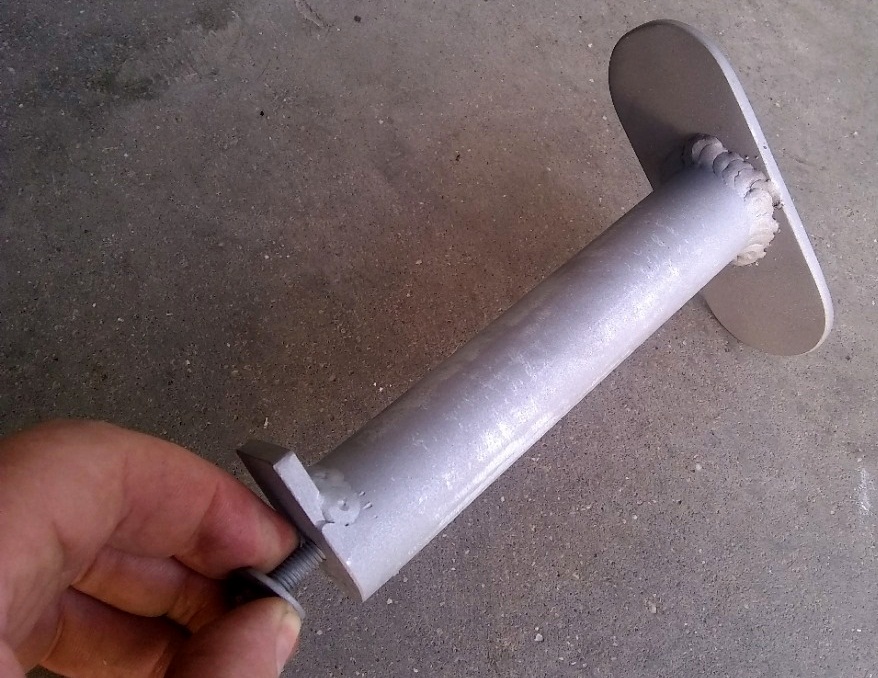
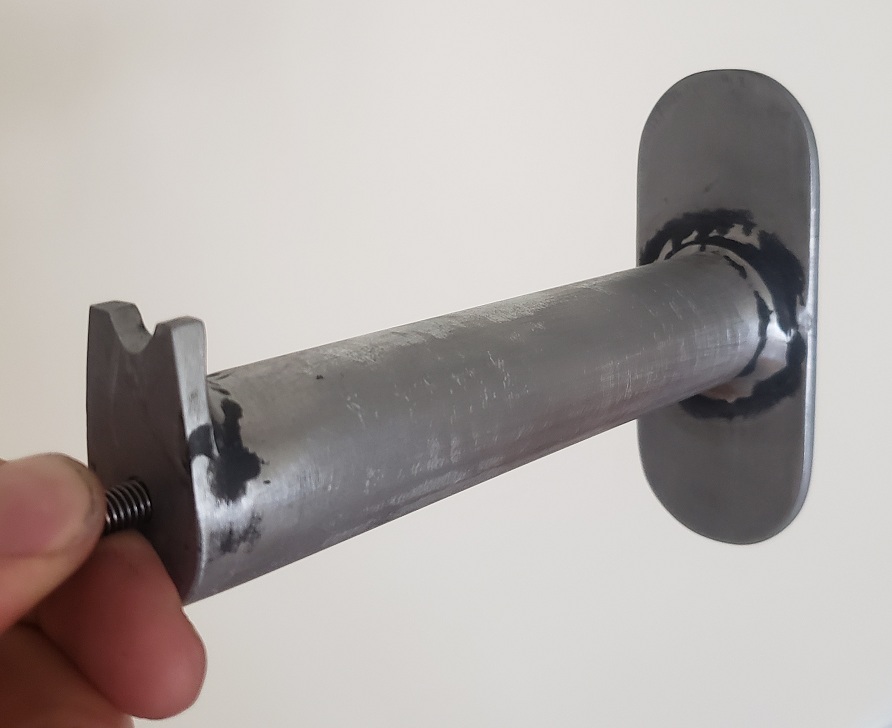
To save money, I had Eric leave the welds fairly crude (so I could clean them up myself) and leave the fitting of the receiver cap to me.

After a few spray coats of black, clear coat, and bolted in place, it looks the part! (Since this photo was taken, I since went back and added a Quick link for use as a sling swivel). The one downside to the screen accuracy of this length stock is that it’s not possible to get a normal cheek weld as the point of contact is moved forward onto the end of the receiver, and it has a ridiculously short pull, so in the interest of ergonomics I may wind up making a proper-length stock down the line.
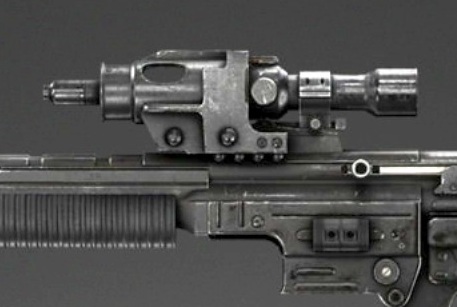
The big ol’ scope…thing…was next on the agenda, and after the magazine was the hardest to retain functionality and also keep on budget. The in-game model above has the scope attached with just one scope ring to the rear sight’s leaf, which is not at all a sturdy platform. I obviously would need a second forward scope ring, which was going to have to somehow sit somewhere inside the ‘scope cage’ and be mounted to a rail of some sort.
Luckily, the adjustable rear sight was easy to remove, leaving two accessible screwholes to mount a Picatinny rail on (I had one kicking around from a $1 thrift store AR15 BB gun I decomissioned). I got a cheap scope on Amazon for $30 and a pair of low-profile rings on eBay for $8. Getting this cheek weld location to play with an 3” Eye Relief scope was frustrating but after some finetuning I got it mounted at the right place. Since the focus on this project is functionality and realism, I didn’t want to have to scratchbuild the ‘scope cage’ out of plastic scraps and Bondo, but I found a well-modeled cage on Thingiverse.
I had to do some tinkering with it in Google Sketchup8 (which I’ve since learned is now a paid or greatly-reduced cloud-based program, grrr) to clean it up and remove the internal ‘scope’ components, but as the machinist friend from above recently purchased a 3D printer he was able to break it in with a couple test prints of this piece:

A prototype print came out about 20% larger, which easily accommodated my new scope without much modification…but was far too large.
Unfortunately my scope’s 32mm objective lens wound up being a hair larger than the 1:1 print’s inner diameter. To use it required some tedious and careful sanding to thin down its inner layer.

While otherwise well-modeled, one drawback to the scope cage is that it still needed some carving out to accommodate the Picatinny rail and scope rings, the ribs below the sight mount, and the raised details in front of the sight mount. After a LOT of trial and error, I eventually got everything fitting right.
The scope is mounted on the rear sight, and the scope cage is held onto the scope’s front by friction so it isn’t going to fall off, yet is still easily removable.

My final hurdle to overcome and complete this ‘blaster’ rifle is the magazine. It came with a 25-round magazine, which is obviously never used onscreen – on Hoth, nothing appears to protrude from the StG’s mag well.
However, since the whole point of this project is to have a functioning repeating ‘blaster’ rifle, I didn’t want to simply remove the magazine and turn the rifle into a single-shot. At the very least, if I am giving a public talk, I need something appropriate to fill the magazine well so there’s no gaping hole.
Ten-round magazines used to be available for this rifle when they first came on the market, but they’ve since dried up.

My first idea, at the beginning of COVID quarantine last March was to try my hand at 3D modeling a shorty mag with my trusty copy of Sketchup. With calipers in hand, I painstakingly modeled the top 1/3 of an StG magazine to potentially be 3D printed, with the exception of some of the internal feed channels. However, with my local library’s makerspace closed due to COVID I was without printing capability (this was before my friend got a 3D printer).
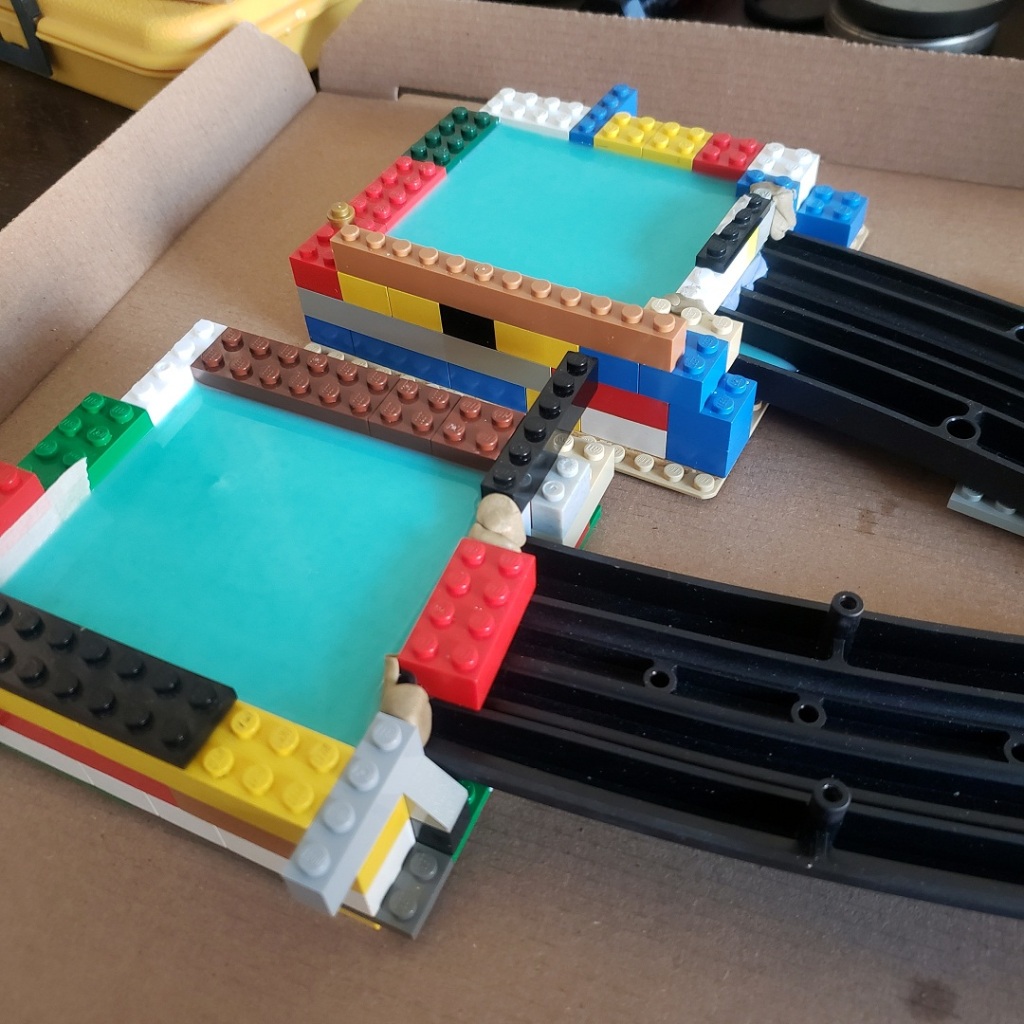
With my own capabilities in mind, late last summer I opted to simply pour silicone molds of the relevant upper section of the magazine. These will be pressure cast in some sturdy resin and fitted with springs and followers. Since magazines are notoriously one of the most fiddly parts of firearms design, I’m also considering using these future casts as shells to conceal a compatible factory .22 magazine, hopefully to get more than the 5-8 shots mine would likely hold when it is eventually finished.
So that’s where we are: I’m 80% sure of what Smooth-On resin I will be casting with, but last month’s Texas snowpocalypse knocked out the petrochemical operations on the Gulf, leading to a hiccup in Smooth-On’s supply lines. Ideally they’ll get some resin back in stock soon, and I can use my Spring Break to bust out my dad’s old pressure pot and cast some magazine halves. Cosmetically, with a little targeted sandpapering the rifle will be good to go, but without a magazine it’s just a single-shot. Hopefully, I will be able to check in just one more time to announce project completion!
Researching, crafting, photographing, and writing this site takes a lot of time and energy. If you’ve enjoyed reading, have learned something from this post, or will use it as inspiration for a future project of your own, please consider supporting my work with a small donation below! Thank you!
Make a one-time donation
Make a monthly donation
Choose an amount (US dollars only – unfortunately, I cannot currently accept Republic credits 😉
Your contribution is greatly appreciated and will help me continue to keep this blog ad-free!
(Alternately, you can support my work via ko-fi as well.)
Your contribution is greatly appreciated and will help me continue to keep this blog ad-free!
(Alternately, you can support my work via ko-fi as well.)

I found some very interesting information about the real world Singlepoint scope that is used in this and other Star Wars blasters. I did a write up on it on the Rebel Legion forums. I think it could help you in your build.
http://www.forum.rebellegion.com/forum/viewtopic.php?p=1149831
LikeLiked by 1 person
Where is the fourth update? I’d love the work you’ve put into this 🙂
LikeLike
Thank you George! Part four is coming soon, I hope! (things have been crazy the last month with transitioning from thruhiking and moving to a new city). I have some resin and my molds out of storage, so hopefully I can cast them in the next few weeks. If I can track down some appropriate magazine springs (Brownell’s is out of stock) I’ll be good to go. Thanks for following along!
LikeLike
I’m looking to do the same with my same .22 STG! I stumbled upon your blog and I’m a little disappointed that it left off here 😦
Did you ever get the magazine figured out? I’ve got some of the factory 10 round magazines but they still protrude too much from the gun.
LikeLiked by 1 person
Hi Bucky, I AM slowly making progress! I got 4 sets of stubby mags and followers cast and extra springs. With the mag protruding maybe 3/8″, it holds three rounds! 😆 rapid fire it will not be. Working on assembling the rest, and fine tuning. Update will be forthcoming, thanks for reading!
LikeLike
Great to hear it’s still coming along! Looking forward to the next update 😀
LikeLike