Applied geometry: Star Wars style

thermos1155-after4
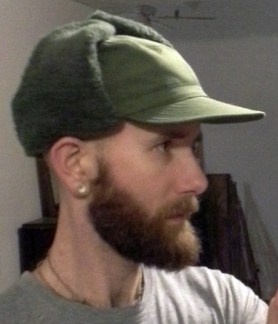
One of the largest stumbling blocks to getting a real-world-functional GFFA kit is the lack of references to everyday material culture in the Galaxy. We have little evidence, for example, of the kinds of containers your average galactic citizen has around the house—do the citizens of Bespin have Tupperware? And as someone with an interest in creating a realistic—but recognizably Star Wars-y—set of outdoor-adventure gear, this is a wall I have often run into. When we have so few resources to draw on, we instead have to get creative in our solutions. In this case, since we have little gear to draw aesthetic inspiration from, why not draw inspiration from the gear that influenced the aesthetic we aspire to?
Viewed through modern eyes, it’s pretty clear that the original Trilogy films are products of the 1970s and 80s…so let’s take a look at late 70s and early 80s Tupperware and Thermos products!
Continue reading “Applied geometry: Star Wars style”

Project: modding the Naboo winter shirt

(My apologies for the unintentional hiatus, dear readers. Back-to-school is a hectic time, but as I get back into the swing of things, I am able to get back to work on projects and keeping up the blog.)

silk_beforeafter

Between the cooler temperatures, low humidity, and new-fallen leaves (ideal for making debris shelters and leaf mattresses), it’s no surprise that autumn is the go-to season for most reenactors.
Even though the events that are most welcoming for a Star Wars ‘living historian’—sci-fi cons and the like—are traditionally held in air-conditioned hotels in summer, there is no reason why you should limit yourself to such controlled indoor events! I believe that if this particular hobby is to (one day ) be taken seriously by the larger Historic reenacting community, we should be as equipped as they are to deal with weather of all seasons, and not be afraid to get Out of the convention center!
Continue reading “Project: modding the Naboo winter shirt”

Building the Rebel persona – 4.1: Naboo soft kit

Based on the broad trends noted in the previous post, I decided that my Naboo civilian impression would need (at minimum) a tunic, trousers, and tall boots, and possibly an outer layer as well.
shirt
The tunic would need to follow local style, and so be in a muted color, have an overlapping and/or asymmetrical closure, a high Mandarin collar, and long sleeves, probably without cuffs.
Continue reading “Building the Rebel persona – 4.1: Naboo soft kit”

Building the Outer Persona: a three-season pack

While I’ve been humping my Bergan external frame pack around for almost a decade (and I’m very pleased with it!), I’ve been starting to wonder if maybe it isn’t…overkill. As an aspiring minimalist, I like to try and pare my outdoors kit down to the bare essentials, and a large frame pack with lots of attachment points—in a gear version of Jevon’s Paradox (as one’s pack increases in capacity, the expanded space cannot help but be filled)—only makes it too easy to throw in everything but the kitchen sink.

bugout bag2
pictured: Exhibit A

I realized then that while the Bergan is perfectly suited to be a winter pack—able to carry a tarp, sleeping pad, and blanket/sleeping bag, plus a drybag of spare clothes and other seasonal necessities—I might need something a bit more modest for the rest of the year. Continue reading “Building the Outer Persona: a three-season pack”

Crafting the Coldweather Hat

After acquiring a Swedish winter cap for $10, I had originally planned to do just a few simple modifications—removing the superfluous rear buckle, replacing the fake fur of the flaps with wool, and then giving it a dunk in some brown RIT dye.20180215_203640
However, the more I looked at the Pfilbee Jhorn pictures, the more I felt that simply relying on the similar shapes of his hat and the Swedish one wouldn’t be enough to make this an authentic piece.
Continue reading “Crafting the Coldweather Hat”

Building the Outer Persona: an authentic Gaderffii

Back in the beginning of the year, when I was only doing an AgriCorps Jedi impression, I started thinking about what it might look like to do a living history ‘display’ in the GFFA. For actual historic periods, displays at events often take the form of a collection of soldier’s gear laid out for the public:
VnamLHDisplay
In my mind’s eye, I thought it might be interesting, starting out, to simply have a collection of in-universe ‘artifacts’ for the public to examine, which could function as potential ‘engagement hooks’ for interpretation. Continue reading “Building the Outer Persona: an authentic Gaderffii”

Research Pays Off: Jedi Service Corps Embroidery

Back last spring when I was first putting my AgriCorps Jedi persona together, I wanted some way to help indicate (besides the bucket hat, folding trowel, and complete lack of lightsaber) that Silo wasn’t another run-of-the-mill Knight that most people picture when they think ‘Jedi’. What I really wanted was some kind of patch that I could sew onto my outfit or field gear to help designate my membership in the Agricultural Corps.
Since I didn’t know of any existing symbols used by the various branches of the Service Corps (what’s the plural of corps? It can’t be corpses?), I opted to use a mid-90s Girl Scout ‘Plant Culture’ merit badge, since—to my eyes—it looked like a pair of non-human hands growing a plant with the Jedi consitor sato technique.
plant culture GS
However, recent subsequent research has yielded a great development—the various branches of the Service Corps did, in fact, have their own insignia after all!: Continue reading “Research Pays Off: Jedi Service Corps Embroidery”

Building the Rebel Persona: 5.2 – Blaster rifle

20210113_124609
Once I had made enough progress on the research front to begin crafting the ‘outer persona’ for a Rebel impression, and had made plans to debut ‘Citizen Olis’ at a summer camp presentation on wilderness survival, I knew I’d need some kind of blaster. While I talk with my hands and demonstrate a fair amount during workshops, it’s still nice to have a blaster at your hip or on a sling, etc., as it underlines the always-armed attitude of a partisan guerilla: Continue reading “Building the Rebel Persona: 5.2 – Blaster rifle”

Building the Rebel Persona: 5.1 – Helmet

As I said in the previous Hard Kit overview, I opted to give ‘Citizen Olis’ a little armor in the form of a Rebel ‘swoop’ helmet.
“Rebel soldiers wear very little protective armor, typically a helmet at most, though some soldiers wear chest and abdomen plates. Alliance tacticians believe that complete freedom of movement is more useful than the dubious protection provided by armor—which rarely stops a blaster bolt anyway.” West End Games: Rebel Alliance Sourcebook p.99)

As my first serious foray into the world of Pepakura (cardstock + resin), while it’s not perfect, I am extremely pleased with how it turned out! (While researching construction techniques, I came across one fan’s attempt at making the helmet using the same files as I did…I was determined to have the final product come out better than his—a rather low bar—but I am still quite surprised how nice mine looks in the end).
olishelm DSC05064
The road from computer file to three-dimensional helmet, however, was long and winding. Continue reading “Building the Rebel Persona: 5.1 – Helmet”

Step 5 – Craft It!

Now that you know what you want to do (as a reenactor or interpreter), who you’re going to portray (your persona), and (after careful research and/or use of the Galactic Style Guide) what you’re going to wear while doing it, the time has come to gear up and clothe your persona in appropriate ‘garb’. If you know how to sew, great! If not, it’s always a good time to learn! A simple websearch for ‘basic sewing stitches’ will yield plenty of tutorials. Even though we’re depicting a high-tech society, tailor droids break down now and then, so hand-sewing is fine too! (the first time I made my Jedi tunics, I opted to sew the main seams with a sewing machine, and then finish the seams by hand).

When it comes to making or buying elements of one’s kit, it always pays to remember The Designer’s Paradox:

fast-cheap-good-design-diagram
You can have it CHEAP, you can have it FAST, or you can have it GOOD.
Choose carefully, because you can only pick two!

In other words, getting something cheap and good takes time; fast and good costs money up-front, while cheap and fast will cost you in the long run.

Since there are plenty of how-to pages out there (costume tutorials abound on the internet), I will try to keep this short and sweet.
A quick primer on fabrics and their properties as they pertain to our purposes: Continue reading “Step 5 – Craft It!”