
In a previous post, I concluded by saying “when the flavor of the world is ‘no visible fasteners’, then cover up your darn buttons.” However, for some folks that may be easier said than done. If you like the idea of having an outfit be sans visible-fasteners but find the idea of how to actually make it happen a little overwhelming, then this post is for you!
Adding the ability to hide fasteners to your toolbox is a major level-up, especially for those outfitting an Original Character. Off-the-rack items can be great for dressing a ton of far-background characters, or creating a suggestive ‘everyday bounding’ look, but if you’re after a 100%-in-universe-legit look, these kinds of pieces can only take you so far. I hope you’ll note how our main characters almost always wear custom-designed garments, which may still be reminiscent or incorporate elements of familiar/off-the rack pieces, but usually tweaked just a little to give it that timeless GFFA flavor.
In this post, we’re going to show you a second method to create a button-free appearance on an upperbody garment by ‘genderswapping’ our garment, a version of which I’ve used before on this raw silk shirt retool project. How do you swap a piece of clothing’s gender, you ask? Keep reading to find out!

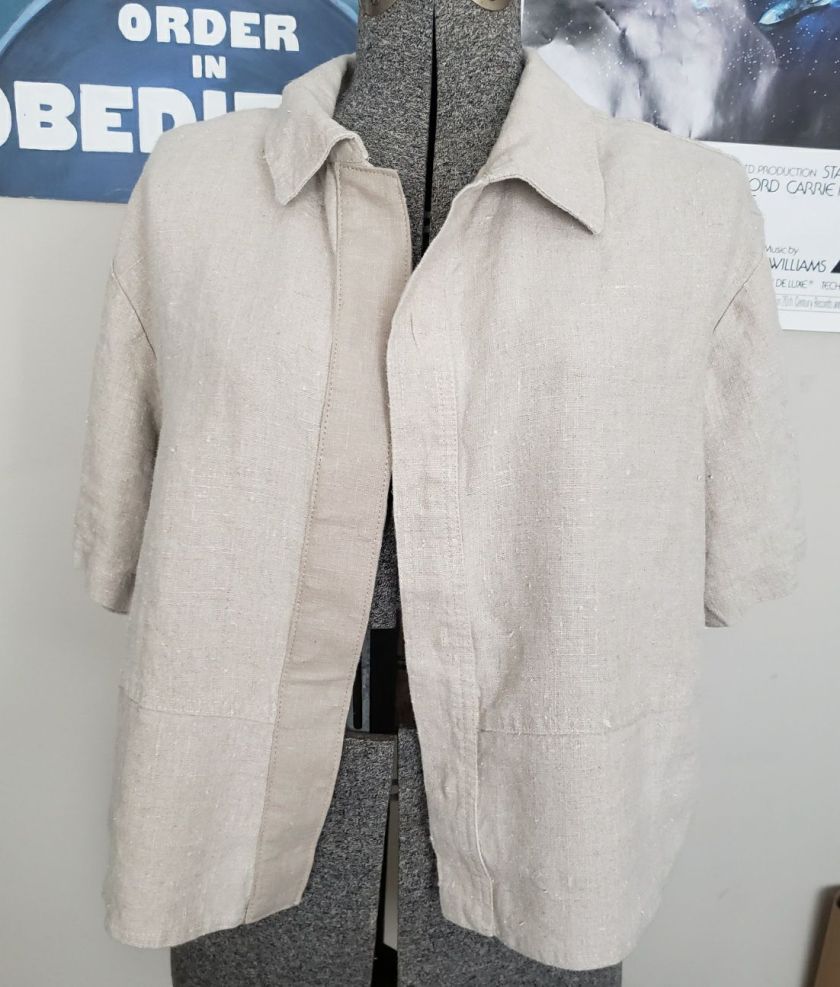
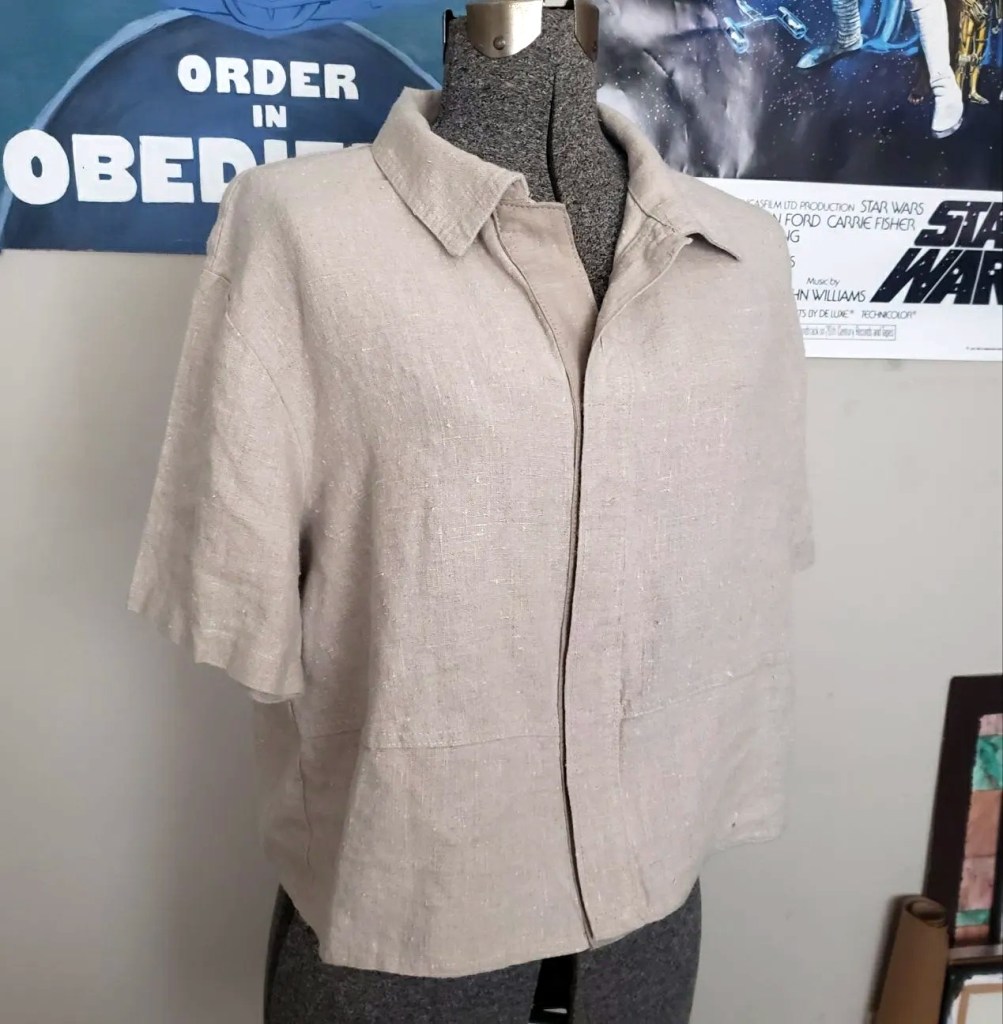
As before, we’re going to demonstrate using this linen buttonup I found at the thrift shop for a few dollars. In this method of no-visible-fastener-ization, we will actually remove the garments’ buttons, flip-flop the closure (in this case, turning the ‘female’(right-over-left) closure shirt into a ‘male’(left-over-right) one), and install an alternate (less-conspicuous) method of fastening.
The ability to create a button-free garment from an opposite-gendered one is a serious upgrade to your skillset as a costumer – any piece you may have passed over because it buttoned on the side opposite of what you’re used to suddenly becomes available to you after all!
Let’s start off by removing our buttons—is there anything in this hobby so satisfying?
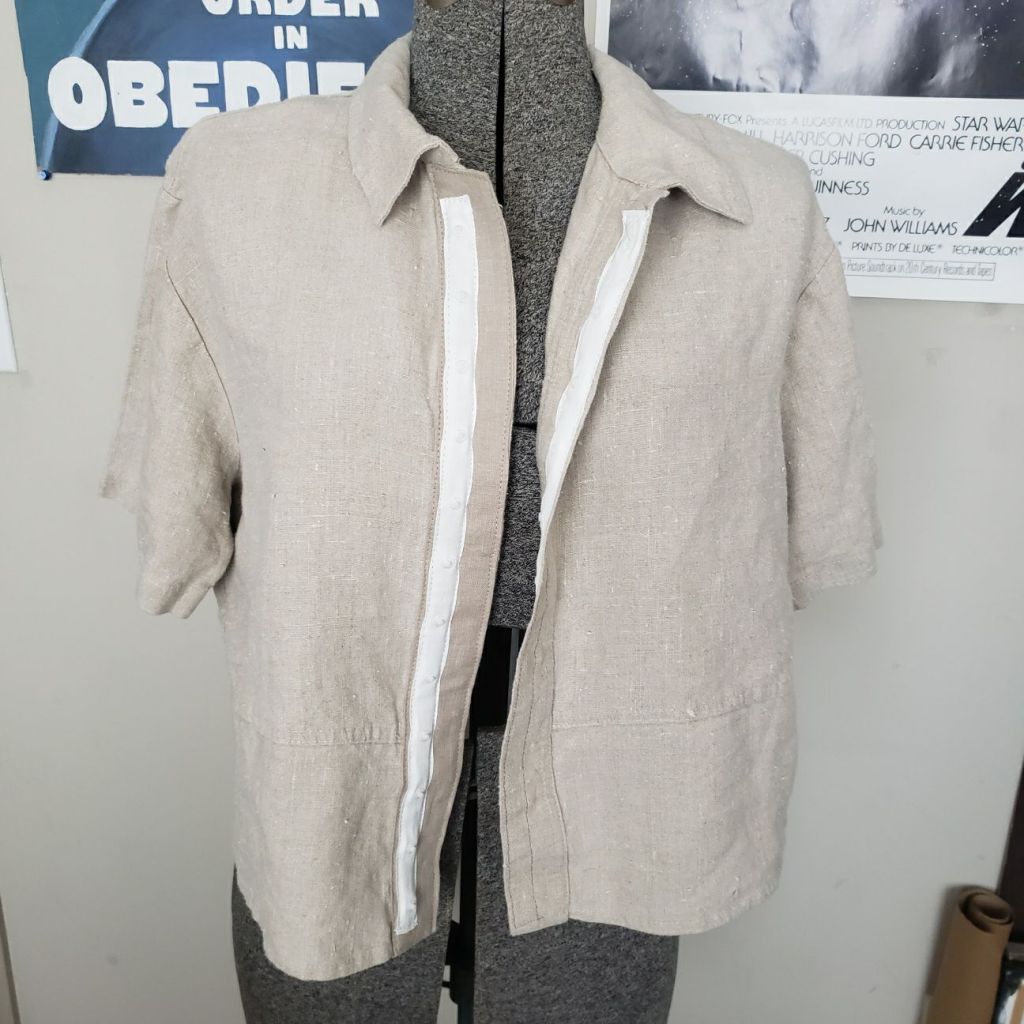
For the actual replacement fastening, you have two methods to choose from: snap tape and good old Velcro. Snap tape is just what it sounds like: a narrow strip of woven tape with small metal or plastic snaps pre-attached—much easier than having to hand-sew those tiny sew-in snaps, and less nerve-wracking than having to set snaps with a tool and risk marring the garment.

Personally, I prefer Velcro for a couple of reasons. As it tends to come in more subdued colors, I feel it’s more inconspicuous if you ever want to wear a garment open, and it’s more accommodating of minor adjustments on-the-fly. Depending on what kind of foot your sewing machine has, it’s also likely easier to sew than snap tape, as the snaps can make it hard to follow the same distance around the edge. Furthermore, even if you pre-dye the snap tape itself to better match the garment, the snaps are still shiny and noticeable if you wear the garment open, which I feel is somewhat at odds with the ‘no visible fastener’ guideline.
As before, you should measure the length of your closure and decide how much of it you want able to fasten when complete. Whichever method you choose to use, you’ll need to cut a length of either Velcro or snap tape the length of your closure. In this case, the snap tape I bought at my local secondhand craft shop came in 18-inch lengths, which is just under the total length of this shirt’s closure. Also, if you’re using snap tape, remember to add a quarter inch or so to each end, so that you can turn the raw ends under.
Then, simply pin in place and sew around all the edges, as close as you can get – 1/8″ or so.
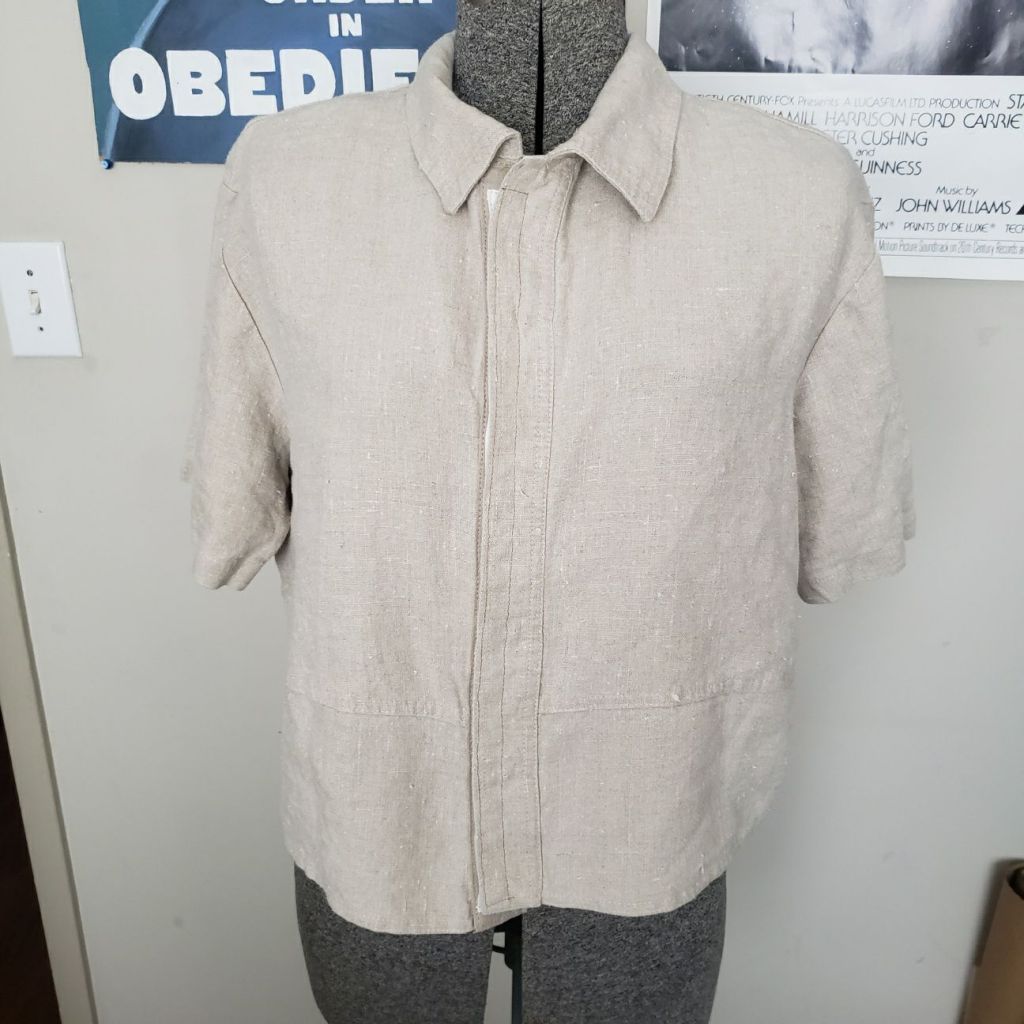
Let’s do the same with Velcro just for fun (this piece came precut at this length, so we get a slightly open neckline)

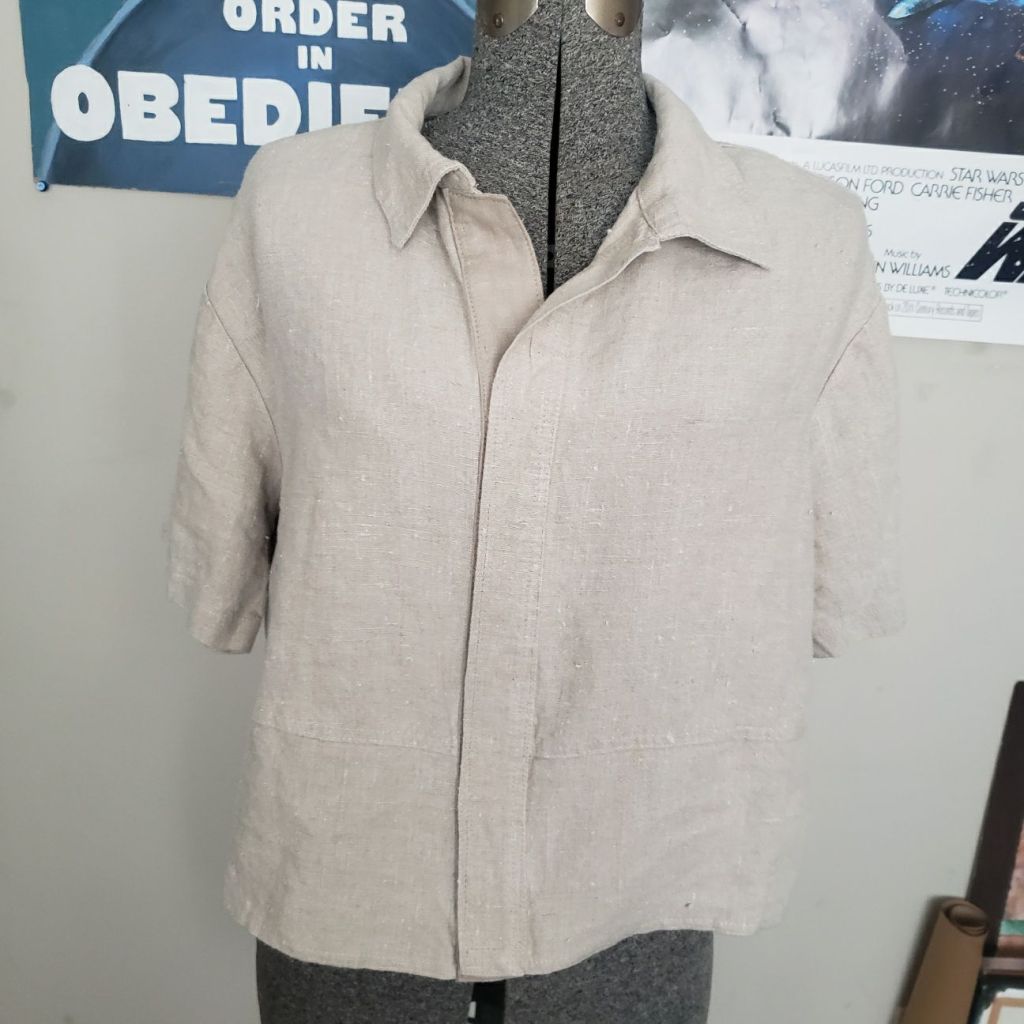
Just like last time, this is a Big Improvement for in-universe accuracy – it’s amazing how such a simple change can instantly make a garment look so much closer to something that would be worn in the Galaxy Far, Far Away!
I hope you’ve enjoyed the last several sewing tutorials I’ve shared here on the blog – are there any other mini-projects that you’d like to see covered? Let me know with a comment below, or come discuss these tips & tricks with us at the SWLH facebook group! See you next time!
Thanks to my supporters – writing and photographing these how-to’s takes a lot of time and energy! If you’ve learned something from this post, please consider supporting my work via ko-fi, or with a small donation below! Thank you!
Make a one-time donation
Make a monthly donation
Choose an amount (US dollars only – unfortunately, I cannot currently accept Republic credits 😉
Your contribution is greatly appreciated and will help me continue to bring you this kind of in-depth material! Alternately, you can support my work via ko-fi as well.
Your contribution is greatly appreciated and will help me continue to bring you this kind of in-depth material! Alternately, you can support my work via ko-fi as well.
DonateDonate monthly
One thought on “HOW TO: Hide Your Buttons #2”