
Welcome back! This is the third and final part of my buildlog for attempting to scratchbuild an N1 starfighter pilot’s helmet. When we left off, I had the scaling figured out and patterns drafted, and the side pieces and earmuff details created. Now it’s time to craft the helmet’s shell itself.
To get an idea of how the helmet would look, I transferred the patterns to lightweight cardboard and taped everything together to make a rough mockup of the whole assembly to check the general shape:

This was bonded along the seams (inside and outside) with brown paper bag and PVA glue (left) before brushing both exterior and interior with Bondo resin (center):


The resin is fairly brittle but it adds rigidity, and more importantly it gives the subsequent layers something to stick to. I next made up a batch of ‘Rondo’ (resin + body filler 2:1) and coated the interior by rolling the shell around so that all surfaces got (more or less) an even coating. Next I applied Rondo to the outside, but reversed the ratio for a slightly less runny mixture. I also experimented with tinting the Rondo; the Brownell’s brown epoxy dye I wanted to use was too clumpy to distribute evenly, so I added about a teaspoon of finely powdered red ochre pigment before adding the hardener catalyst (above right).
(My idea behind the tinting was that if the underlying layers were closer to the final color, it wouldn’t require as much actual painting when the time came. Naturally, I forgot about all the stages of sanding I’d have to do in between, so it didn’t make much of a difference but it’s good to know that dry pigments work great with Bondo. In fact, for future projects I may try tinting each round of filler with a different color to help me in seeing which areas sit high or low.)
After the Rondo, it was time for what I think is one of the most satisfying stages in a project like this – the first pass of rough sanding (80 grit), when the shape of the true helmet inside magically emerges from beneath its blobby Rondo shell….in our pursuits, there’s nothing more attractive than a smoothly sanded surface! After that, it was just a few rounds of sanding (up to 320 grit) and spot puttying (left), which I somehow didn’t know about on my first two helmets(?!) – definitely a level-up and major time saver.
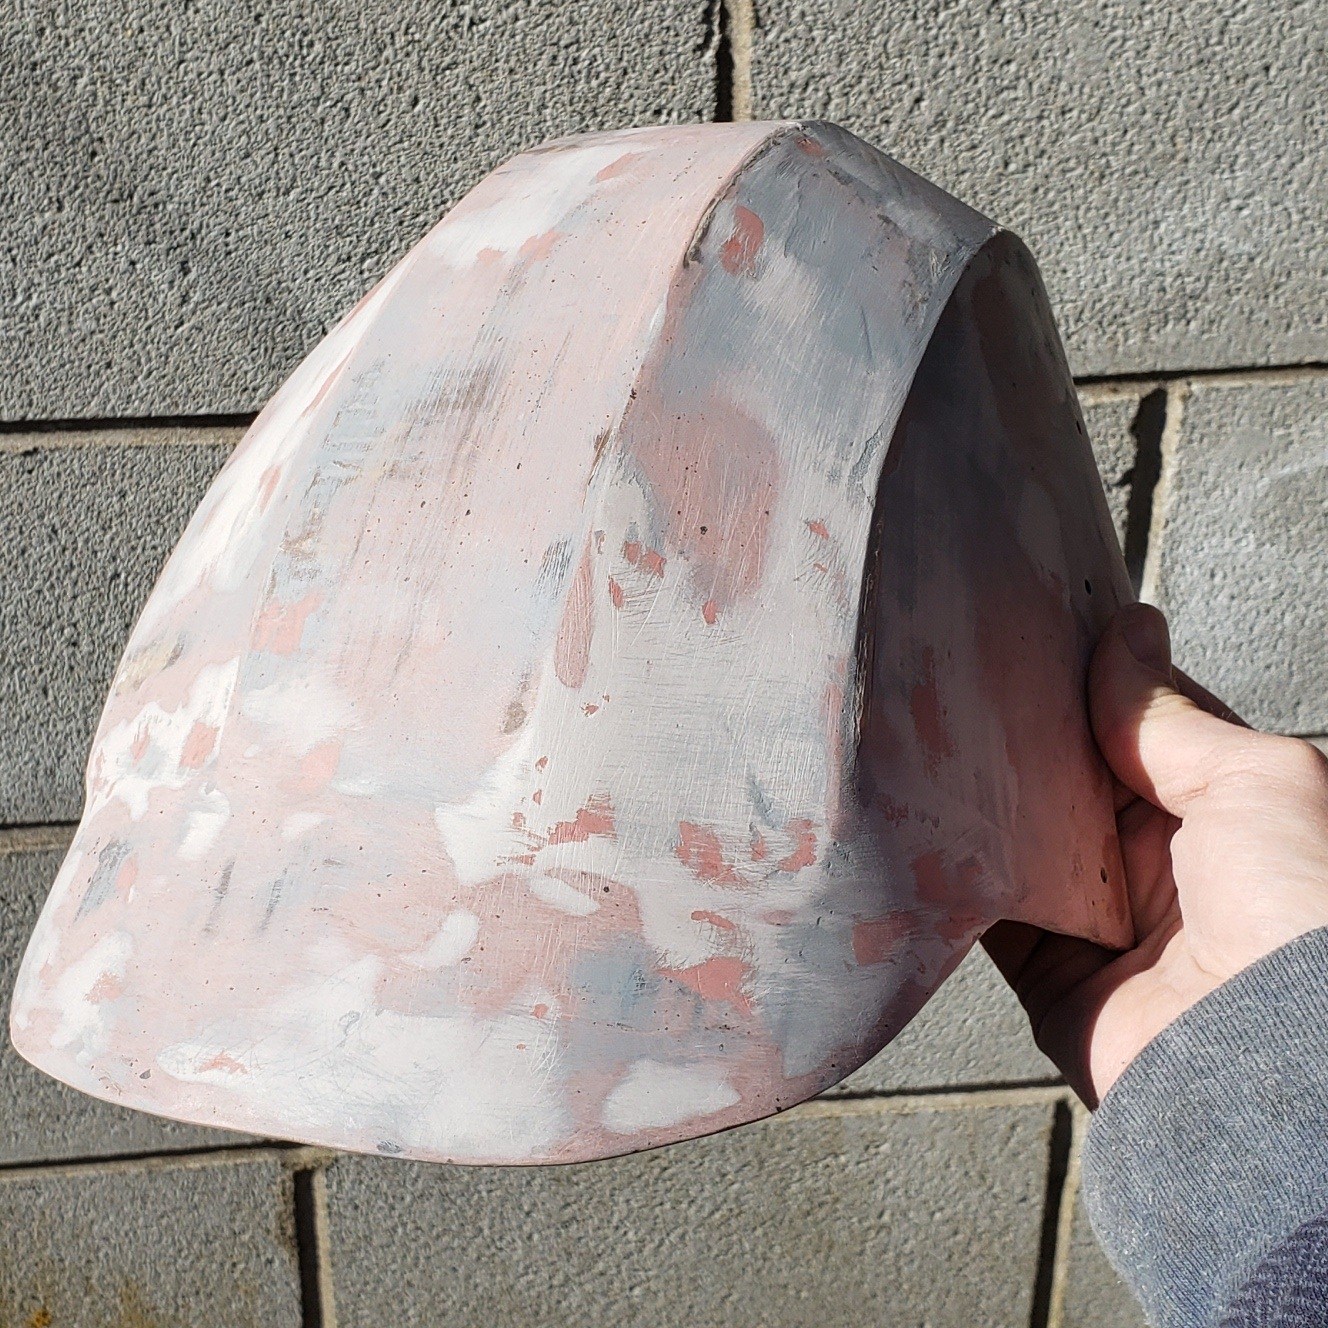

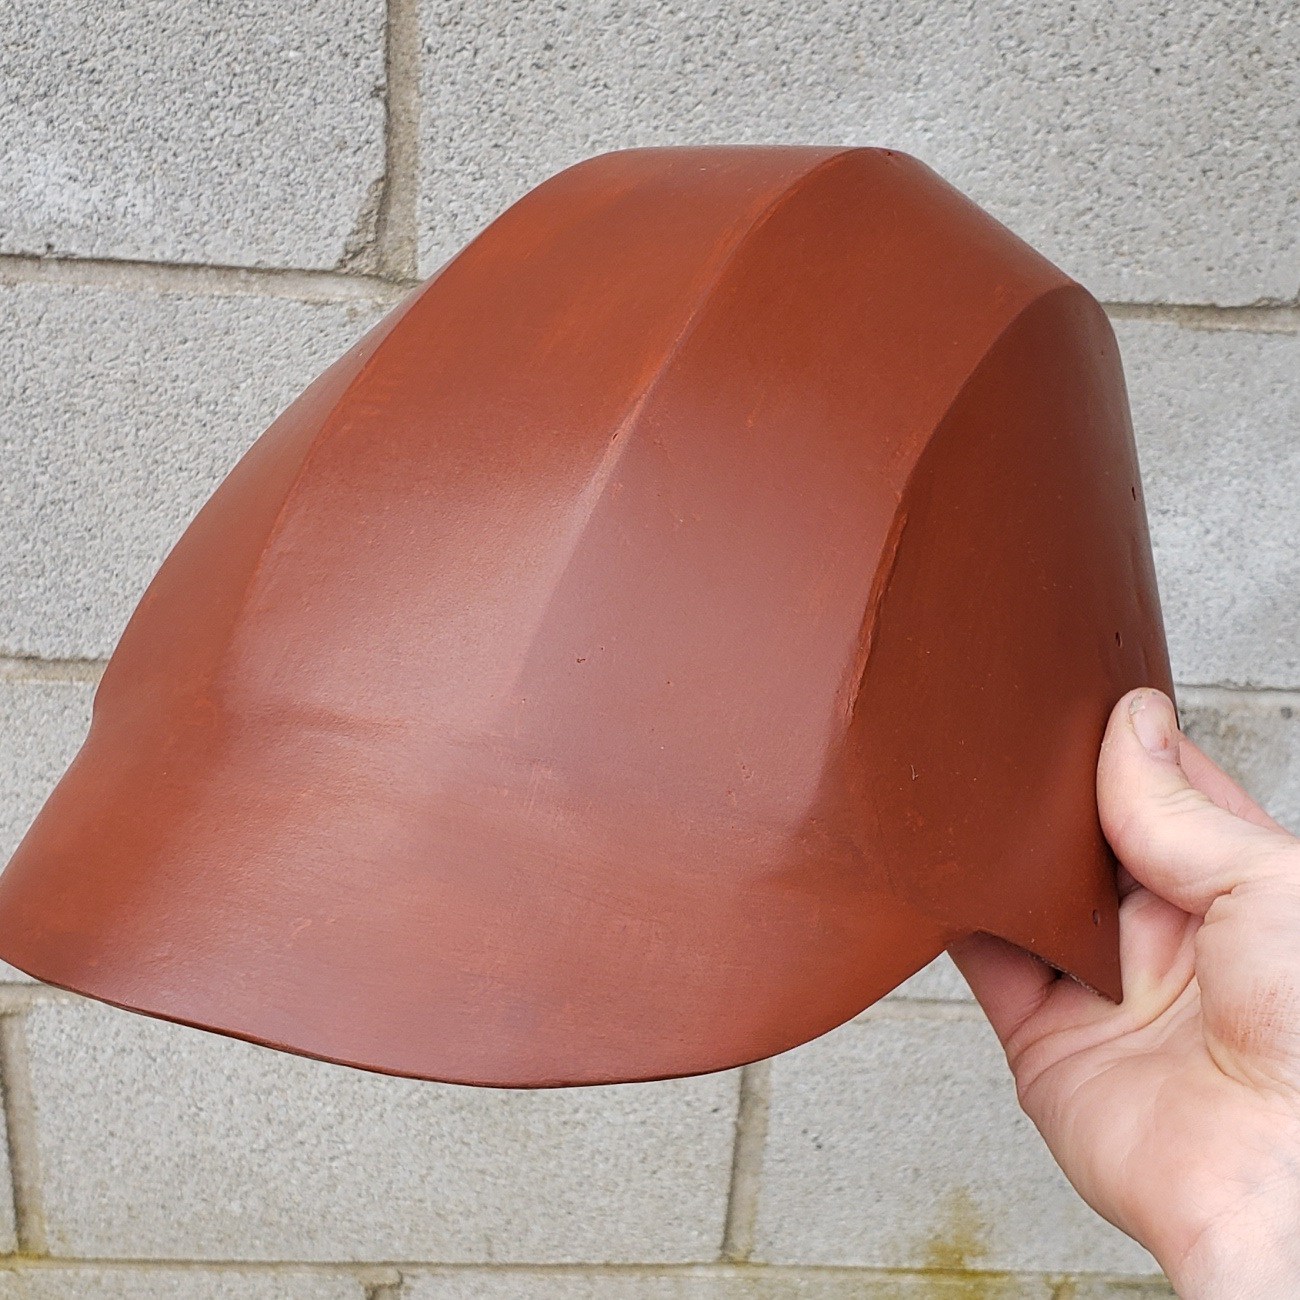
The primer I used (center) was the same reddish brown I used on my captured stormtrooper forearms last year, which is decently close to the Naboo helmets in the films. However, being a primer it has a matte finish, which isn’t very good for this project – we want a nice, satin-y, burnished-leather look. Luckily, I had a bottle of waterbased woodstain (though I’m pretty sure it’s just watered-down acrylic paint) called ‘Cedar’ in my box of patina supplies. While the stuff is useless as advertised, it’s great for weathering and adding color-depth to props. My method is to pour a small amount on, and then rub it all over the item by hand until the paint starts to get almost oily, moving in one direction to create thin streaks; then I let it dry (which surprisingly takes much longer than regular brushed-on acrylic would) and use a satin clear coat to set it. Quite the improvement (above right)!
With preliminary painting complete (I would add some dark washes once all the other parts were installed), it was time for the step I had been dreading…not because I didn’t want to do it (it was really quite meditative), but because I knew it couldn’t measure up to what was onscreen.

As I said before, while the onscreen helmets were meant to look like leather, I don’t think they were actually were leather: thus the silvery ribbed piping which outlines the whole thing isn’t actual stitching, though it’s clearly meant to suggest it. If I could source some 1/4″ plastic spiral tube and glue it into all the seams, getting the onscreen look would be easy, but that was a bit beyond me. So my helmet—while also not leather—needed to be crafted as if it were leather (and hopefully one day I’ll make one which will be).
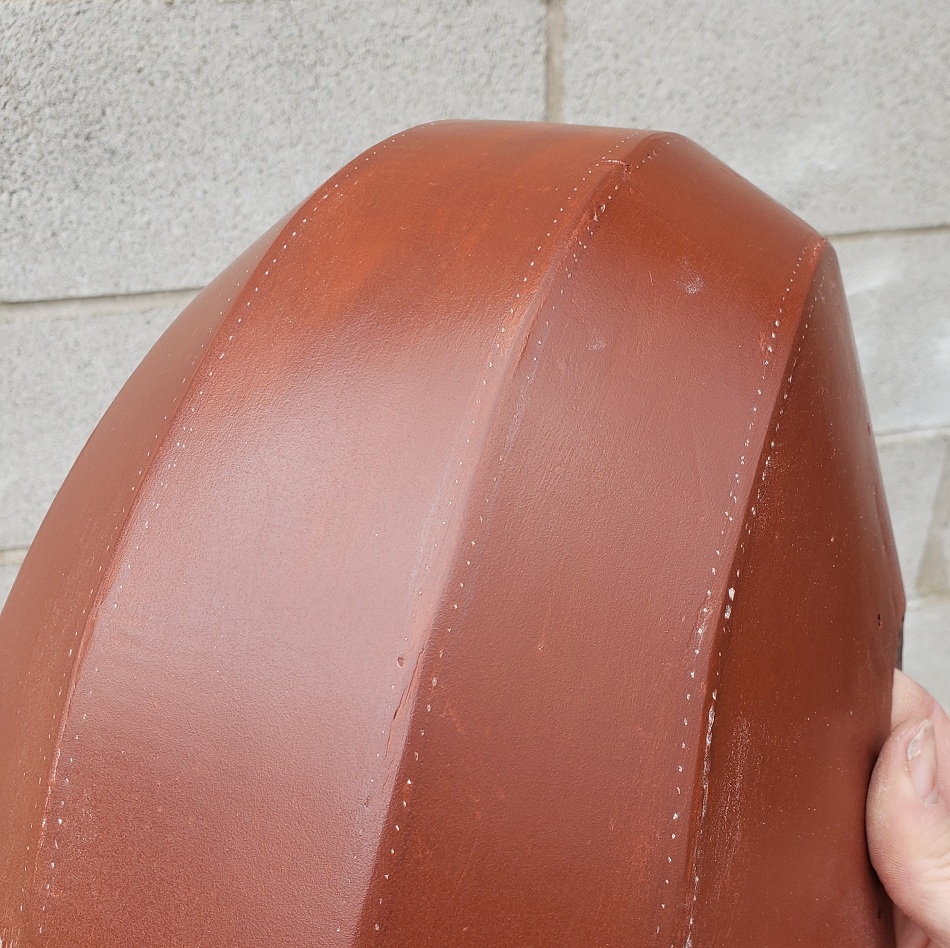
You wouldn’t think to look at it, but the helmet’s total edges measure 171 inches, and I had to roll my eight-teeth-per-inch leather-pricking wheel over them all…and then had to drill a 3/32″ hole for each mark it made…so do the math – yeah, that’s 1,368 holes.
Believe me when I say that it would’ve been far easier to lay out all those stitches on actual leather than it was to lay them out over curved, hardened cardboard. For one thing, I would be marking them while flat, so keeping a consistent distance from the edge would be no sweat. With this, however, despite my best efforts the wheel wanted to wobble all over the place, and even though they were in a straight line when it came time to drill, my tiny, slightly-off-center Dremel bit liked to shift as it chewed through the layers.
(I actually wanted to use a smaller (5/64″) drill which would’ve been a tighter fit for the cord I was using, but I wouldn’t be able to fit both needle and cord through such a hole (though I guess I could have stiffened the end of the cord with glue to make it into a point or something…ah, hindsight).
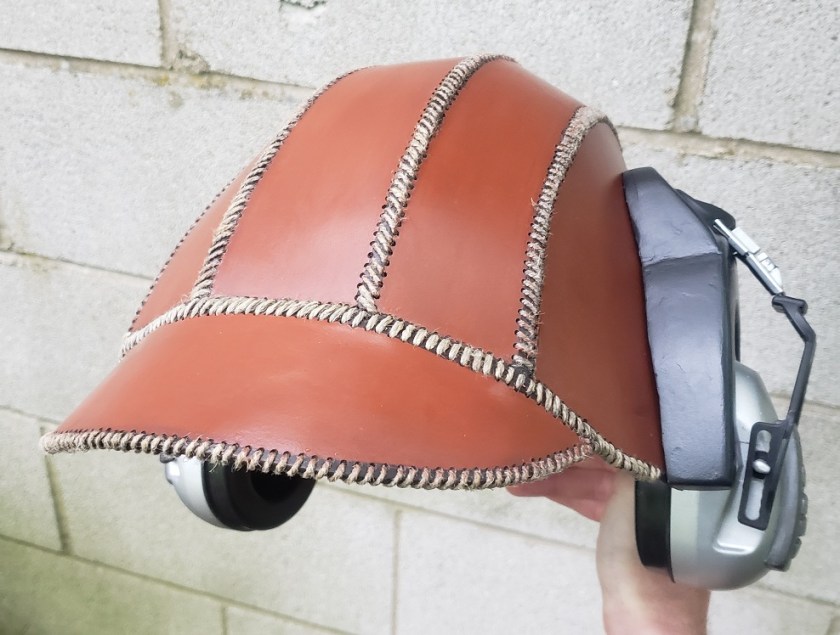
Anyway, after drilling all the holes and darkening them with paint, I fetched my roll of Italian linen cord, pulled up some streaming Britcoms, and got to work. After about four hours of stitching and installing the ear pieces, I had this to show for it!:

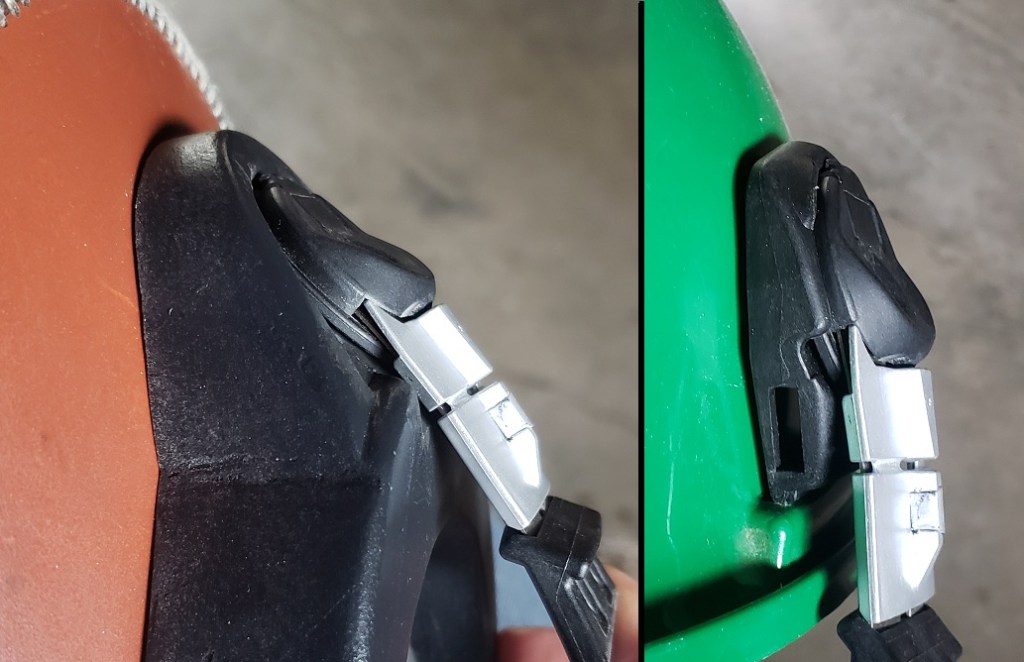
Here—almost at the finish line—was where I ran into a true hurdle: I realized I hadn’t planned how I was going attach the earmuff arms! As you’ll notice, the pilot helmet as designed does not include the clip that is used to attach the earmuff to the hardhat:
I figured I had two options. 1: I could redesign and remake the wooden side pieces to integrate the earmuff clip (which I could probably make work but would further deviate from the onscreen prop). or 2: simply glue (using E6k or epoxy) the arms in place. However, what I really wanted was to retain functionality and the ability to use the earmuffs with my hard hat…and every idea I had for how to make the earmuff arms removable sounded like a headache and a half.
However, after looking closely at how the clip and arm mated together, I realized that I could have my cake and eat it too – since there were a couple millimeters of wiggle room under the top of the arm and everything simply snaps together…I used a 3/4″ spade bit to inlet a 3/4″ neodymium disc magnet into the top of each wooden earpiece, and stuck a self-adhesive magnet under the top of each earmuff arm. This lets me magnetize the earmuff arms to the helmet, pop them off, and then click them back onto the hardhat clips whenever I need earpro in the shop!
So, what does the end result of all this frenzied crafting look like?
I’m a perfectionist, so I’m 90% pleased with how this helmet came out…there are definitely some things I will need to do differently for an eventual Mark II (which will hopefully be a proper leather shell) in a few years. Eagle-eyed readers will note that the angle of the visor is different in this picture from those above, as after ‘finishing’ the helmet for this post, I realized how to fix the issues I was seeing, and chopped a 1-inch curve off the forehead area (I’ve updated the pattern in Part 1 to reflect this improvement).
Aside from the issue of uneven stitching, I’m very much looking forward to giving it a weathering regimen along the lines of what I did to my camouflaged ‘swoop’ helmet – to give it an appropriately-grubby partizan look!

What do you think? Is there anything I could have done better or should do differently next time? Do you know a crafting trick that would have made part of this build easier? Let me know your comments down below!
If you’d like to have a go at making your own Naboo pilot’s helmet, remember you can find my patterns in Part One of this buildlog. See you next week!
Researching, crafting, photographing, and writing this site takes a lot of time and energy. If you’ve enjoyed reading or have learned something from this project, please consider supporting my work with a small donation below! Thank you!
Make a one-time donation
Make a monthly donation
Choose an amount (US dollars only – unfortunately, I cannot currently accept Republic credits 😉
Your contribution is greatly appreciated and will help me continue to keep this blog ad-free!
(Alternately, you can support my work via ko-fi as well.)
Your contribution is greatly appreciated and will help me continue to keep this blog ad-free!
(Alternately, you can support my work via ko-fi as well.)

One thought on “Project: Naboo pilot’s helmet part 3”