
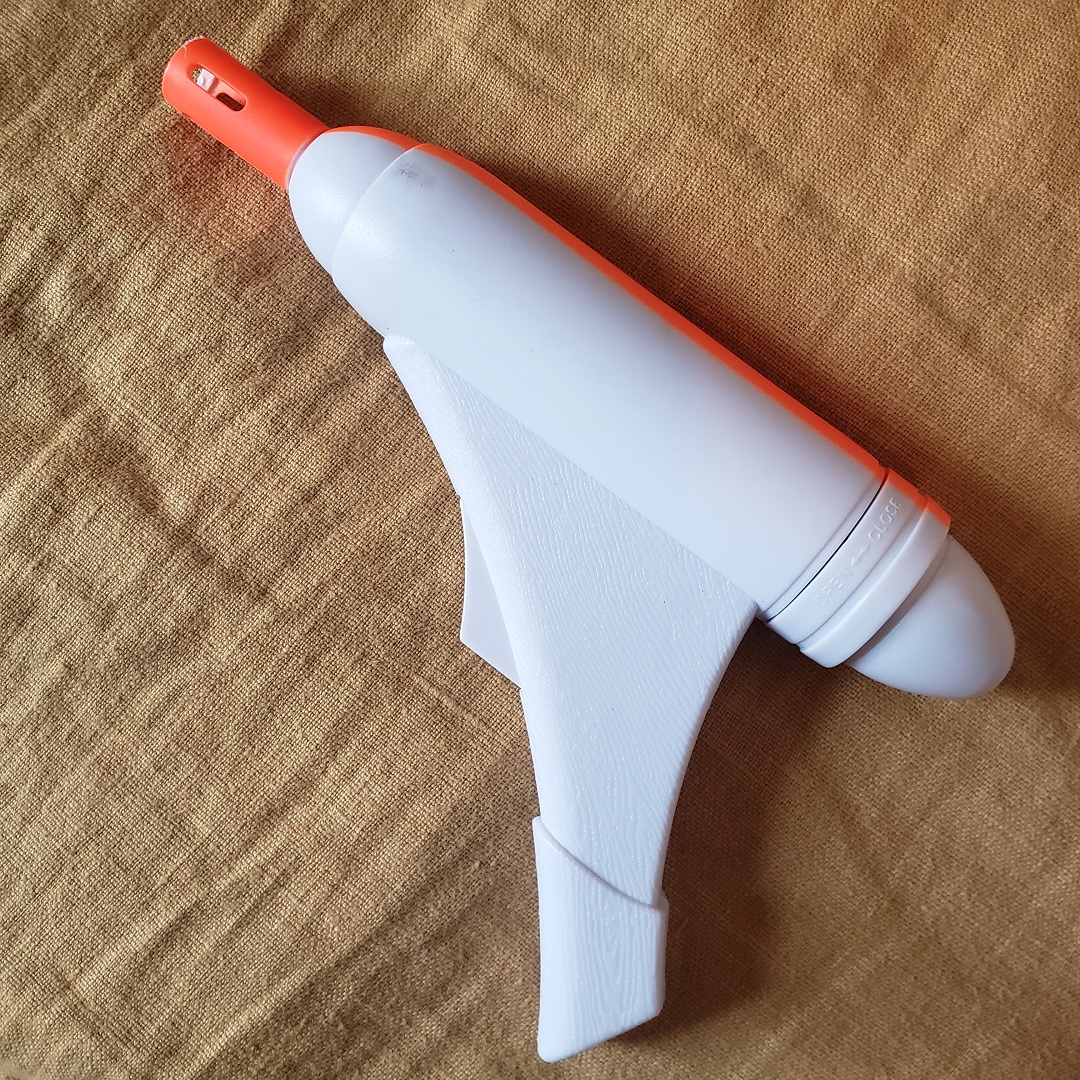

Near the end of last year, while scrolling through some Star Wars groups on facebook I came across someone showing off a bunch of white and fluorescent orange plastic blaster props made by Rubies. While otherwise just another pointless ‘hey look the stuff i ordered got delivered’ post, one of them was something I had no idea even existed in a mass-produced form—the Merr-Sonn Q2 hold-out pistol. (Fun fact: supposedly this blaster was designed by George Lucas himself, and was prototyped from sketch to prop in just one day). While it wasn’t made by them, as a pre-teen in 1999 such a weapon is permanently associated in my mind with Padme Amidala and the planet Naboo, especially given its decidedly un-militaristic Art Deco styling. Seeing that such a replica existed (and was readily affordable!), I realized that including a Q2 in one of my Naboo-based impressions would be a great way to better connect kit and homeworld—especially since those ‘outer personas’ diverge from what most people think of when they picture Naboo style (the typical ‘Renaissance’ style is really a nobility thing).
Since this model blaster is only ever wielded onscreen by Padme or her handmaidens, I had always assumed it was a specially-made pistol just for Royal use. However, skimming through some RPG materials I came across the Q2 included in a listing of common blasters of the Galaxy, where it was listed as acceptable for use in the pre-Empire, Imperial, and New Republic periods—perfect for any of my needs!
I attempted to track one down secondhand but had no luck, so I bit the bullet and snagged one on Amazon…a bit more than I’d like to pay for a plastic shell, but getting things 3D printed is a big hassle for me and I knew the quality of Rubies’ products is decent, even if they’re hideous right out of the box.
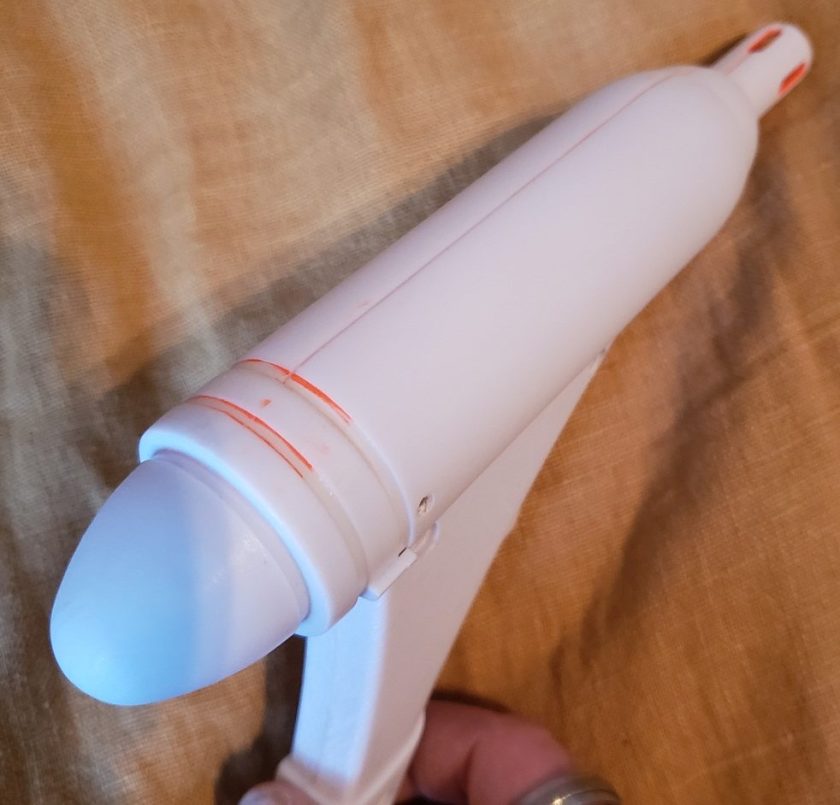
Thankfully, all the blaze orange was only painted on! While some would simply paint over, I figured if/when edges get dinged up, plain white would look much better peeking out from underneath silver than fluorescent orange, so it was time to break out the sandpaper. I also shaved off the branding, safety warning, and Made In China information.
Weight:
If you’ve followed this blog for a while, hopefully you’ve realized that having accurately-weighted gear is a key part of my approach to authentically recreating the GFFA…if I can’t get props and gear made of accurate materials, they should at least feel real in my hand!
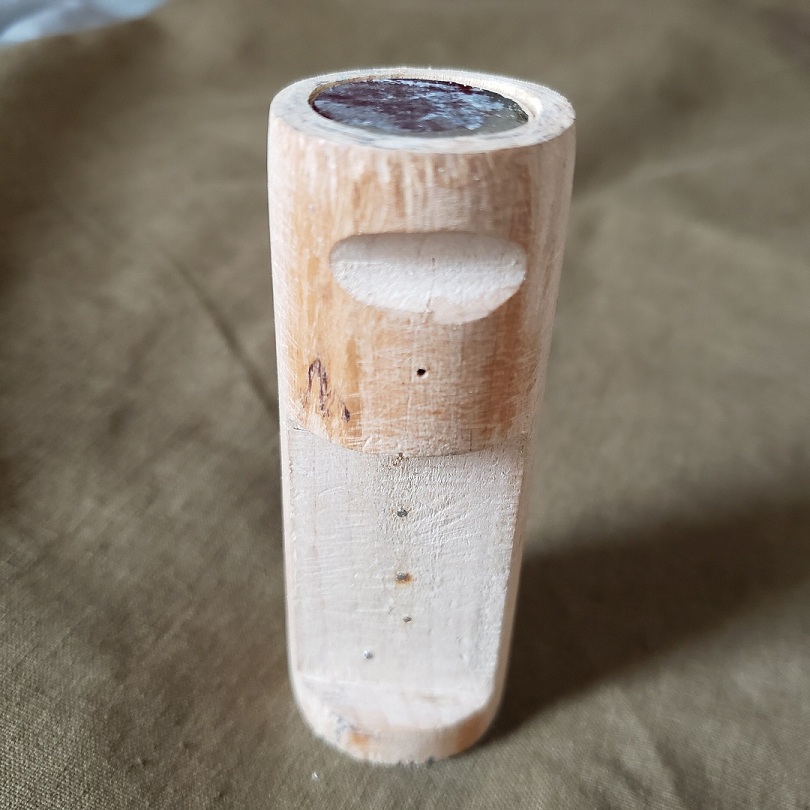
Stripped of its crappy electronics (but retaining the soundboard button which gives the trigger a decently-satisfying firing action), the empty pistol weighed only 57g/2oz. Per the Arms and Equipment Guide, the Q2 pistol is supposed to weigh 500 grams/17.6 ounces (that’s half a standard thermal detonator!). To reinforce and add some weight, I packed the trigger with epoxy, and then filled out the body of the pistol with a length of turned dowel (with cutouts to fit around the two halves’ pins), which brought the weight to 119g (4.2oz). This left the blaster feeling very top-heavy, so to balance things out I added some sheet lead into the grip, carefully cut to still allow the trigger to operate. Two .595″ round balls (the largest muzzleloading ball mold I have) hammered flat to fill in the forward body added some front weight.
My options for adding weight to the pistol’s body was either poured lead or round balls;. my handy-dandy lead weight calculator showed me that a 3x½” cylinder would weigh .4 oz more than 3 inches of .595 balls, so I drilled a ½” cavity into the upper dowel, heated up my new Hot Pot, and got to pouring:
Finally, after everything was assembled and screwed together, the two halves were CA glued together and the seam of the receiver filled with Acraglas epoxy.

Detailing:
A definite positive of this toy is that it has decent functionality—it includes not only a moving trigger but also the butt cap screws off (for installing AA batteries)! Per the Episode I Visual Dictionary, this was the method of reloading the blaster gas cartridge, so you can bet I would have to add some details to make such a reload convincing.
The Visual Dictionary identifies the gun’s trigger as a “snap trigger” for safety; having a heavy pull makes sense as it lacks a trigger guard. Between that and the chrome barrel, the most realistic trigger would be a piezoelectric one from a grill lighter, but installing one was beyond my capabilities at present.
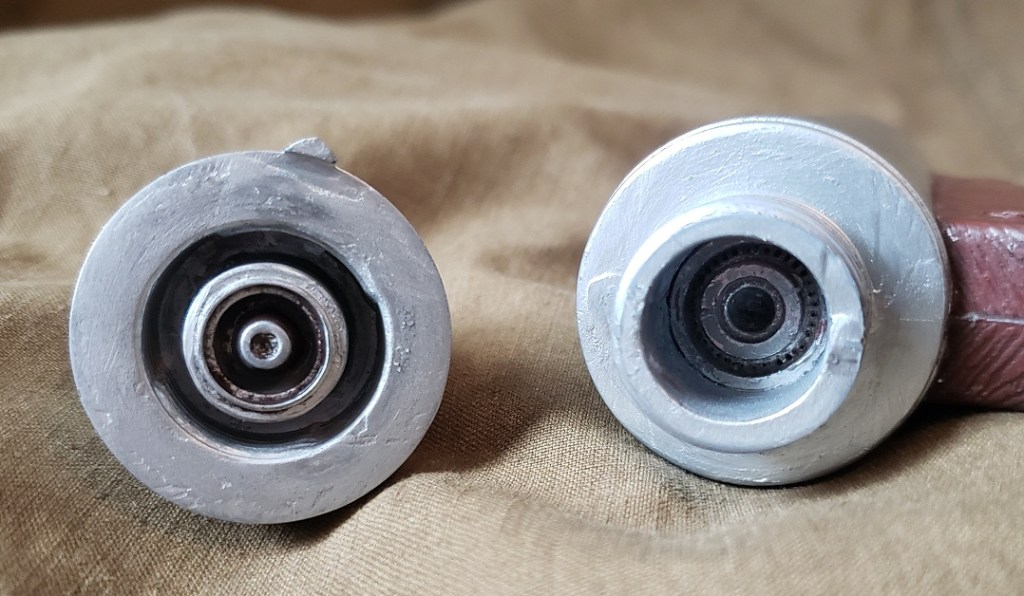
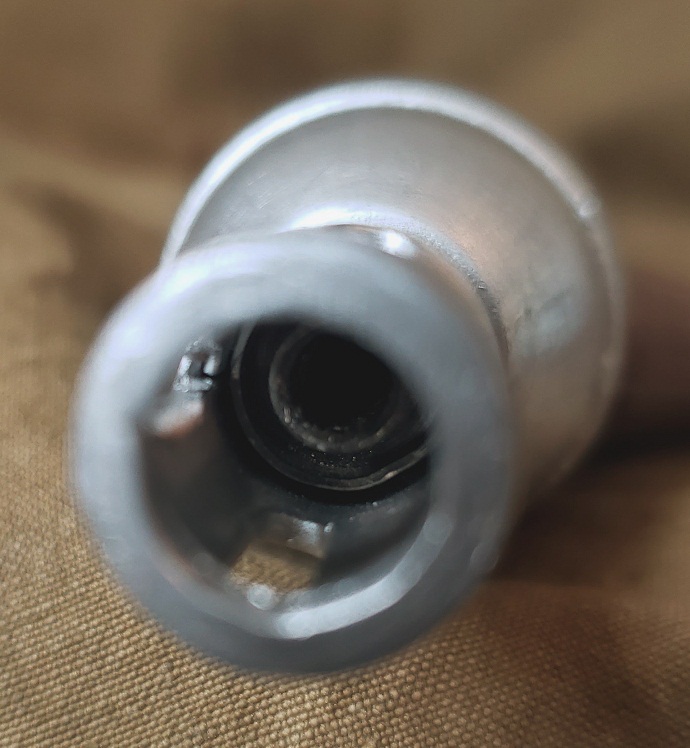
The internal chamber (visible underneath the screw-on butt cap) would definitely need some spicing up to sell the illusion of an actual blaster pistol. I played with a couple of ideas, but eventually shortened the inner battery chamber with the backside of a model Corvette hubcap serving as the Heter valve, which mated perfectly with a Corvette wheel in the butt cap to deliver the Tibanna gas. Since (per RPG details) the gas cartridges were essentially disposable, I originally wanted the butt cap internals to look shiny and new and the valve inside the receiver to look slightly worn (I figure Tibanna gas is a little corrosive?) but my brushed paintjob didn’t quite pull it off. Down the line I may try some more metallic spraypaint on the underside, but for now a light brownwash looks good. Inside the muzzle, a piece from a mini Maglite(?) became a nice ‘emitter’:
Painting:
From my research, the use of chromium by the Naboo was restricted to the Royalty (at least on starships), hence Padme’s various cruisers, barges, and skiffs—plus escort N1 starfighters—being so shiny. Assuming this practice extends to blasters, because I would be depicting a commoner I didn’t need to worry about how I was going to get a mirror finish on a plastic toy – silver enamel paint would be sufficient, and gave a nice ‘brushed’ finish!
Something that didn’t come across in the pictures online—and which came as a surprise to me when I got the pistol in hand—is that the grip was sculpted with a wood-grain effect; this made painting a convincing wood-grain comparatively easy!

As you can see, the final weight wound up being 502 grams/1.1 pounds…which is pretty damn close enough to spot-on for me!
Overall, I’m very pleased with how this project turned out – and three months is a pretty quick turnaround for me! Looks and durability-wise, it can’t compare to machined aluminum and exotic woods, but for having less than $20 invested in it I think it’ll do just fine. My only complaint so far is that being so smooth, it’s a very slippery design, and when I tried concealing it in my boot, it slid straight to the bottom! :O
What other items of kit could you use to better connect an impression with a home planet? Let me know your ideas in the comments!
Researching, crafting, photographing, compiling, and writing this site takes a lot of time and energy. If you’ve enjoyed reading, have learned something from this post, or will use it as inspiration for a future project, please consider supporting my work with a small donation below! Thank you!
Make a one-time donation
Make a monthly donation
Choose an amount (US dollars only – unfortunately, I cannot currently accept Republic credits 😉
Your contribution is greatly appreciated and will help me continue to keep this blog ad-free!
(Alternately, you can support my work via ko-fi as well.)
Your contribution is greatly appreciated and will help me continue to keep this blog ad-free!
(Alternately, you can support my work via ko-fi as well.)

2 thoughts on “Project: Naboo pistol retool”