
Quarantine projects continue! It took a while to figure out and execute, but after my usual lull, I again have something worth sharing! While molding and casting the familiar V8 greeblies on the front of the receiver was pretty straightforward, these side greeblies on the rear receiver were another story.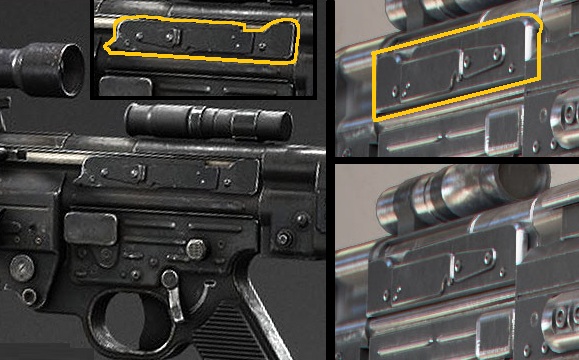 In the research phase of this project, I had been unable to find any suppliers online who offered them, and the one 3D model I found which included them wasn’t accurate enough for my tastes. While my own 3D modeling skills are pretty rudimentary, I still consider 3D printing a last resort, especially as I abhor the hassle of tracking down a printer-for-hire, and my public library’s makerspace is COVID-closed for the immediate future.
Playing to my strengths, with Occam’s Razor and a little sixth-grade maths, I opted to simply scratchbuild the greeblies myself! The right side piece was basic enough, but I ran into a hangup when it came to the left side piece. On a piece of 3D code, of course, the rifle’s charging handle doesn’t need to move…but on a functional rifle, it does. So I decided to shorten the piece vertically to keep the proportions similar. I also ground out a space on the bottom of the charging handle to allow it to pass over the side greeble without rubbing.
After scratchbuilding out of ABS sheet scraps, I poured a two-piece silicone mold: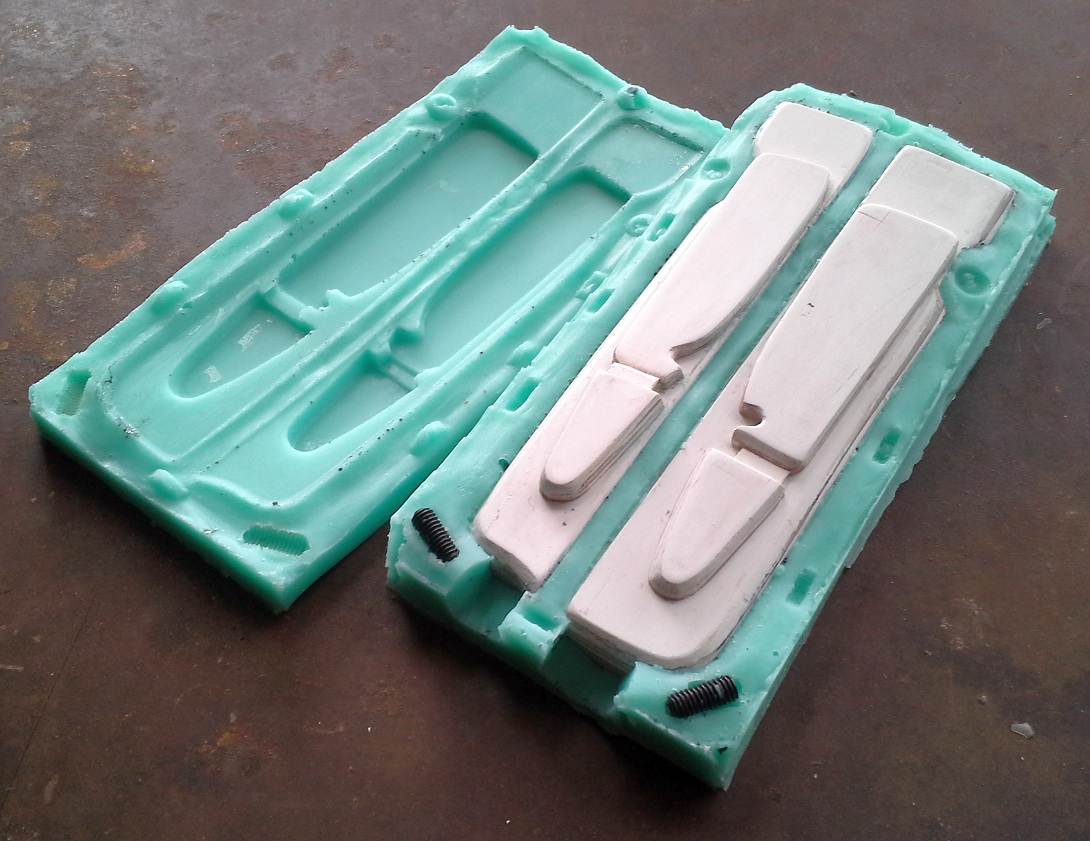 I then cast the pieces in resin (with black and silver pigments added). Next time I will try dusting the mold with the silver pigment before pouring to hopefully get a more metallic look. The silver pigment came out as more swirly than uniformly mixed, so I wound up spraypainting the pieces black before drybrushing silver. At least with the colored resin, if the paint wears off there won’t be a contrasting color showing through. Finally, for the finishing touch, I added some tiny star-head screws scavenged from an old hard drive. Attached to the receiver with black epoxy, I think they look great.
 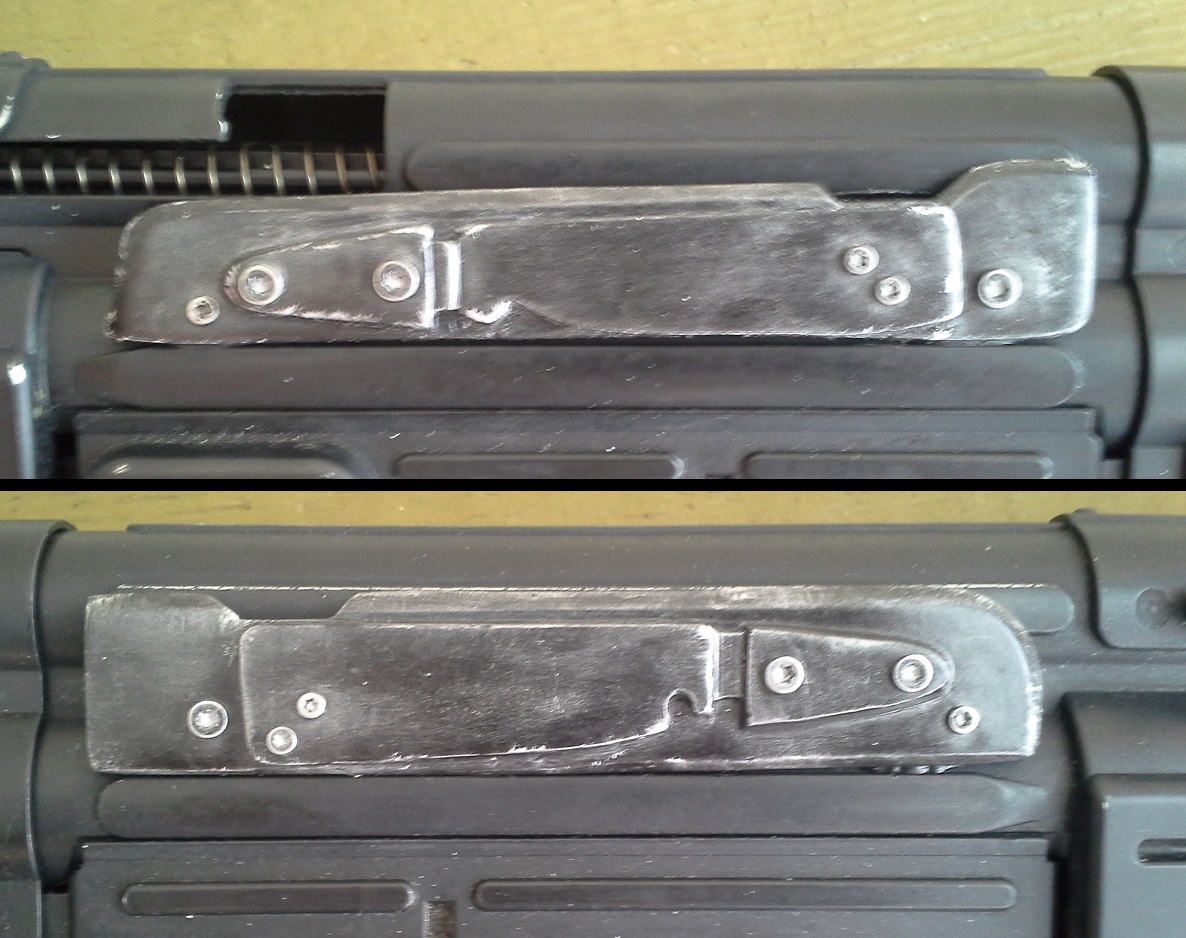 I still need to work on getting the color of the greeblies and the rifle to match better, which will require some careful high-grit sandpapering.
With a reusable mold and plenty of casting supplies on hand, I will likely offer these pieces to others who may build their own A295 in the future.
There are still several elements that still remain before this rifle is finished, but with the current situation, these are essentially bottlenecked and unable to proceed. Until next time!
Researching, scratchbuilding, photographing, and writing this site takes a lot of time and energy. If you’ve enjoyed reading, have learned something from this post, or will use it as inspiration for a future project of your own, please consider supporting my work with a small donation below! Thank you!
Make a one-time donation
Make a monthly donation
Choose an amount (US dollars only – unfortunately, I cannot currently accept Republic credits 😉
Your contribution is greatly appreciated and will help me continue to keep this blog ad-free!
(Alternately, you can support my work via ko-fi as well.)
Your contribution is greatly appreciated and will help me continue to keep this blog ad-free!
(Alternately, you can support my work via ko-fi as well.)

2 thoughts on “A295 rifle conversion update 2”