
 One of the largest stumbling blocks to getting a real-world-functional GFFA kit is the lack of references to everyday material culture in the Galaxy. We have little evidence, for example, of the kinds of containers your average galactic citizen has around the house—do the citizens of Bespin have Tupperware? And as someone with an interest in creating a realistic—but recognizably Star Wars-y—set of outdoor-adventure gear, this is a wall I have often run into. When we have so few resources to draw on, we instead have to get creative in our solutions. In this case, since we have little gear to draw aesthetic inspiration from, why not draw inspiration from the gear that influenced the aesthetic we aspire to?
Viewed through modern eyes, it’s pretty clear that the original Trilogy films are products of the 1970s and 80s…so let’s take a look at late 70s and early 80s Tupperware and Thermos products!
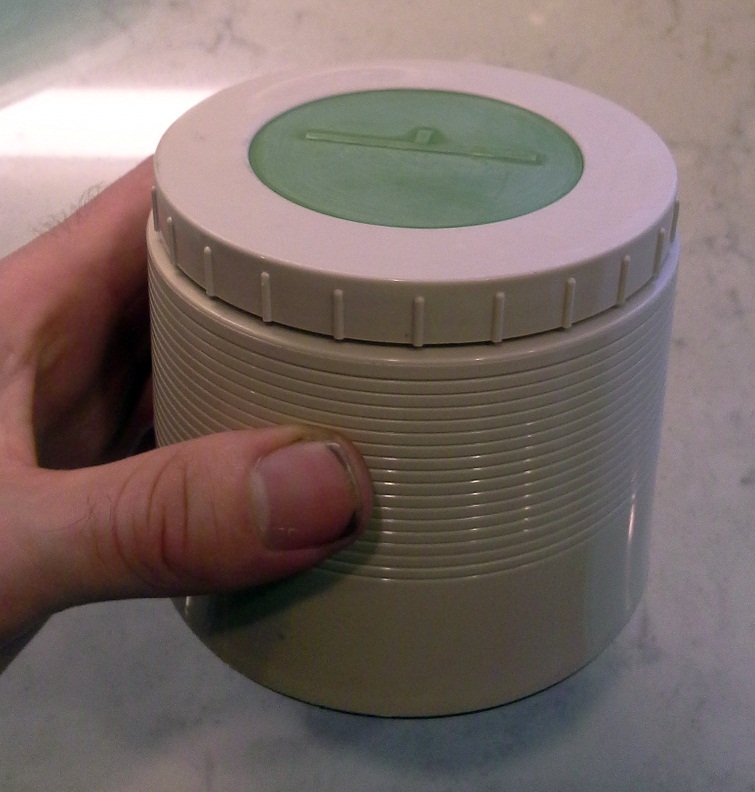
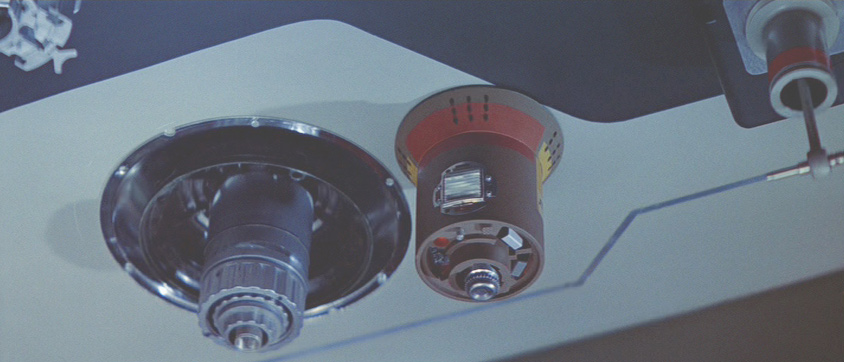
I actually arrived at this solution in reverse. A year or more ago, while combing my local thrift shop, I found a cool little cylindrical container…I liked its ribbed exterior, neutral color, and the honeycombish symbol on the lid. The size and shape also (probably) reminded me of the detonation charges used by the Endor strike team in Episode VI, and for like, 50 cents, I couldn’t pass it up.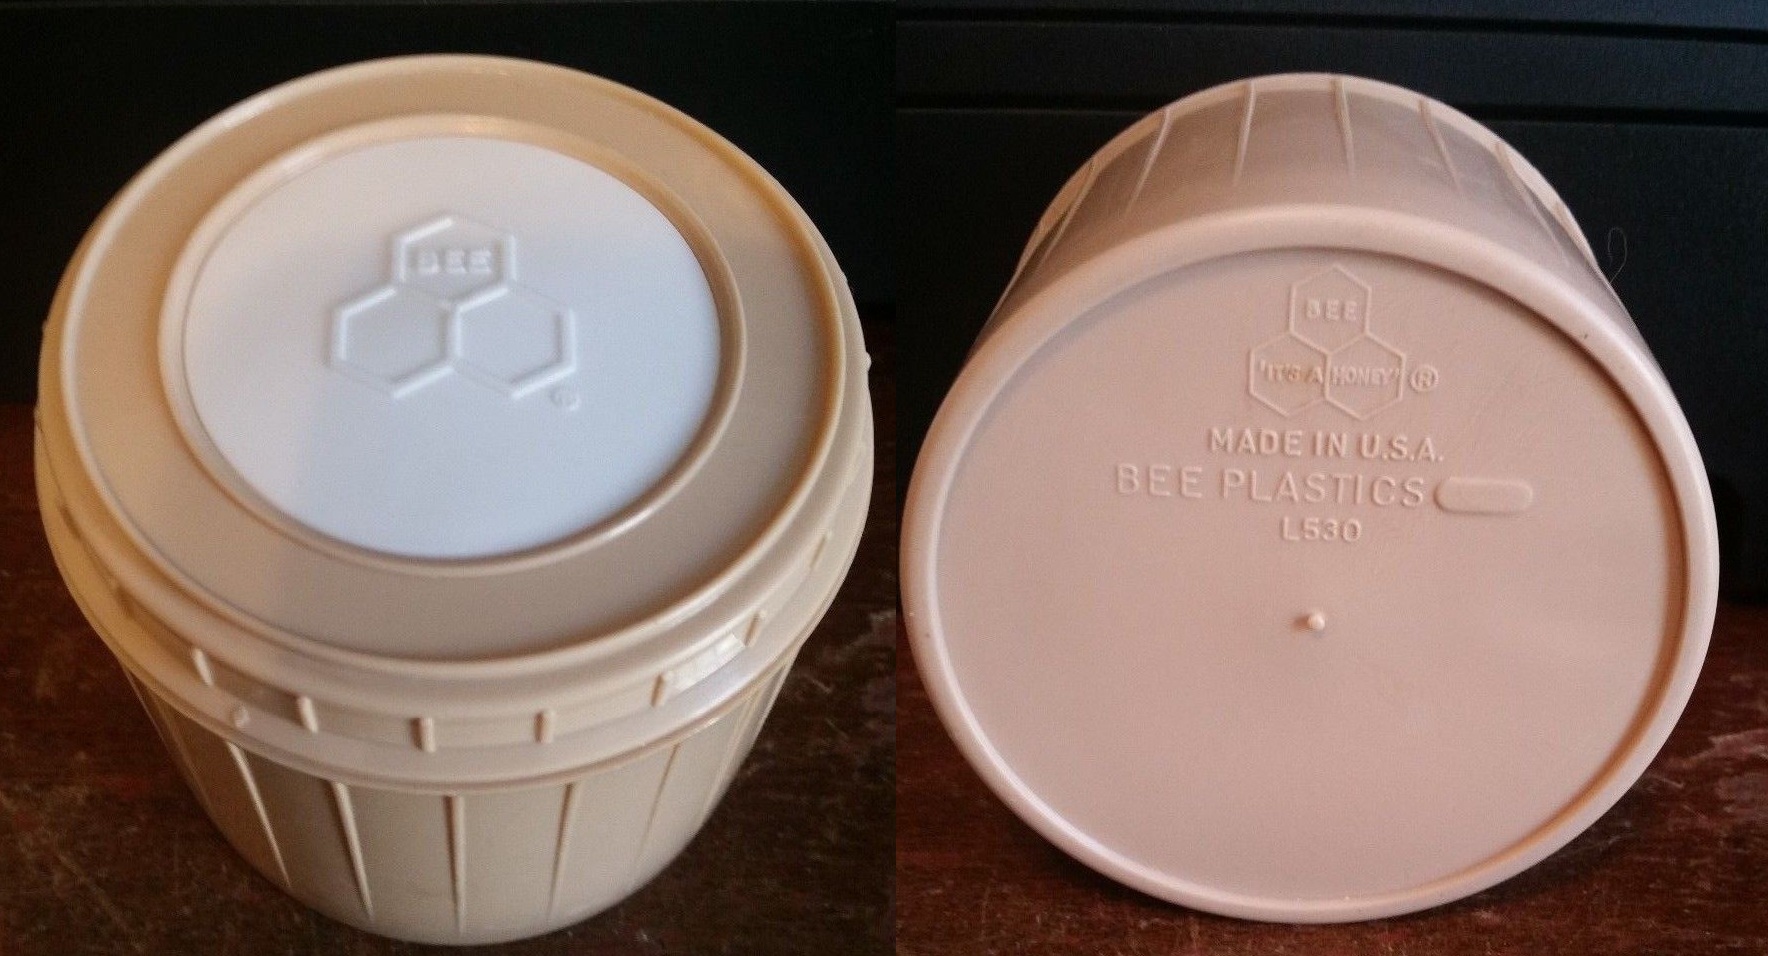
I quickly sliced off the identifying words (keeping the hexagons), and figured it would make the perfect GFFA honey container—as honey is handy on the trail not only for sweetening foodstuffs but also as an antibacterial wound treatment if things go south.
I haven’t been able to find any information on either the company or the vintage…but based on the other colors I’ve seen them in (teal, mustard yellow, and flower power X-wing pilot jumpsuit orange), I’m guessing mid-1970s plus or minus a few years.
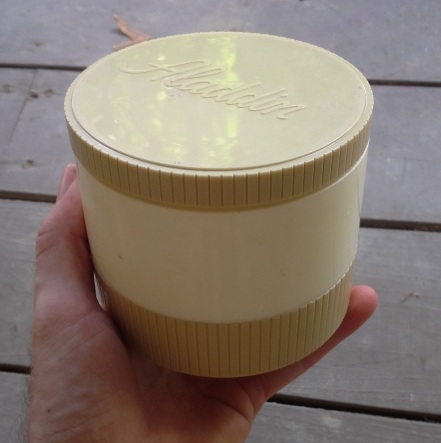
Over the next several months, a couple of similar containers came up as well. Subdued earth tone colors, ~1 cup capacity, and insulated, I liked the little colony they made in my kitchen. But when it came to what they would be used for on the trail, I was at a loss. 200 milliliters is a hair less than a full cup, which isn’t much of anything to have on hand. That’s a perfect amount for a long trek’s worth of honey, but beyond that, I didn’t know…butter, maybe?
That’s when I put on my spatial-mathematics thinking cap. I got to looking at the two containers (an Aladdin Thermo Jar #7000 and a Thermos Insulated Jar #1155) and their various pros and cons. The Aladdin jar was a little larger overall, but I felt its ample insulation capacity would be useful for keeping some luxury chilled on the first day of an outing—a flask’s worth of Corellian whiskey, perhaps? (This jar also poured a bit better than the other).
On the other hand, I also observed that the Thermos jar was set up with its threads on the outside of the central cavity, which meant that, in theory, I could cut the cup out, remove the insulation, and significantly increase its capacity. And since I only had a dollar invested in it, I figured I didn’t have much to lose!


I first went around the inner ring with an exacto knife, followed by a 3” exacto blade to try and separate the cup from the surrounding urethane foam insulation. With a little persuasion, I was able to pull the small cup out, quickly chip the foam away from the shell, and clean up the inner lip.
Only then did I find out that the bottom piece was not (as I had assumed) glued in place, but simply snapped in and lightly held by friction. I also uncovered the previously-unnoticed three small holes in the bottom (something to do with allowing hot/cold air expansion?)
Since I didn’t plan on using the cup to hold liquids, the holes wouldn’t be an issue—and might allow some air circulation to prevent the contents from molding. To secure the bottom lid, I mixed up a small batch of strong epoxy and glued it in place.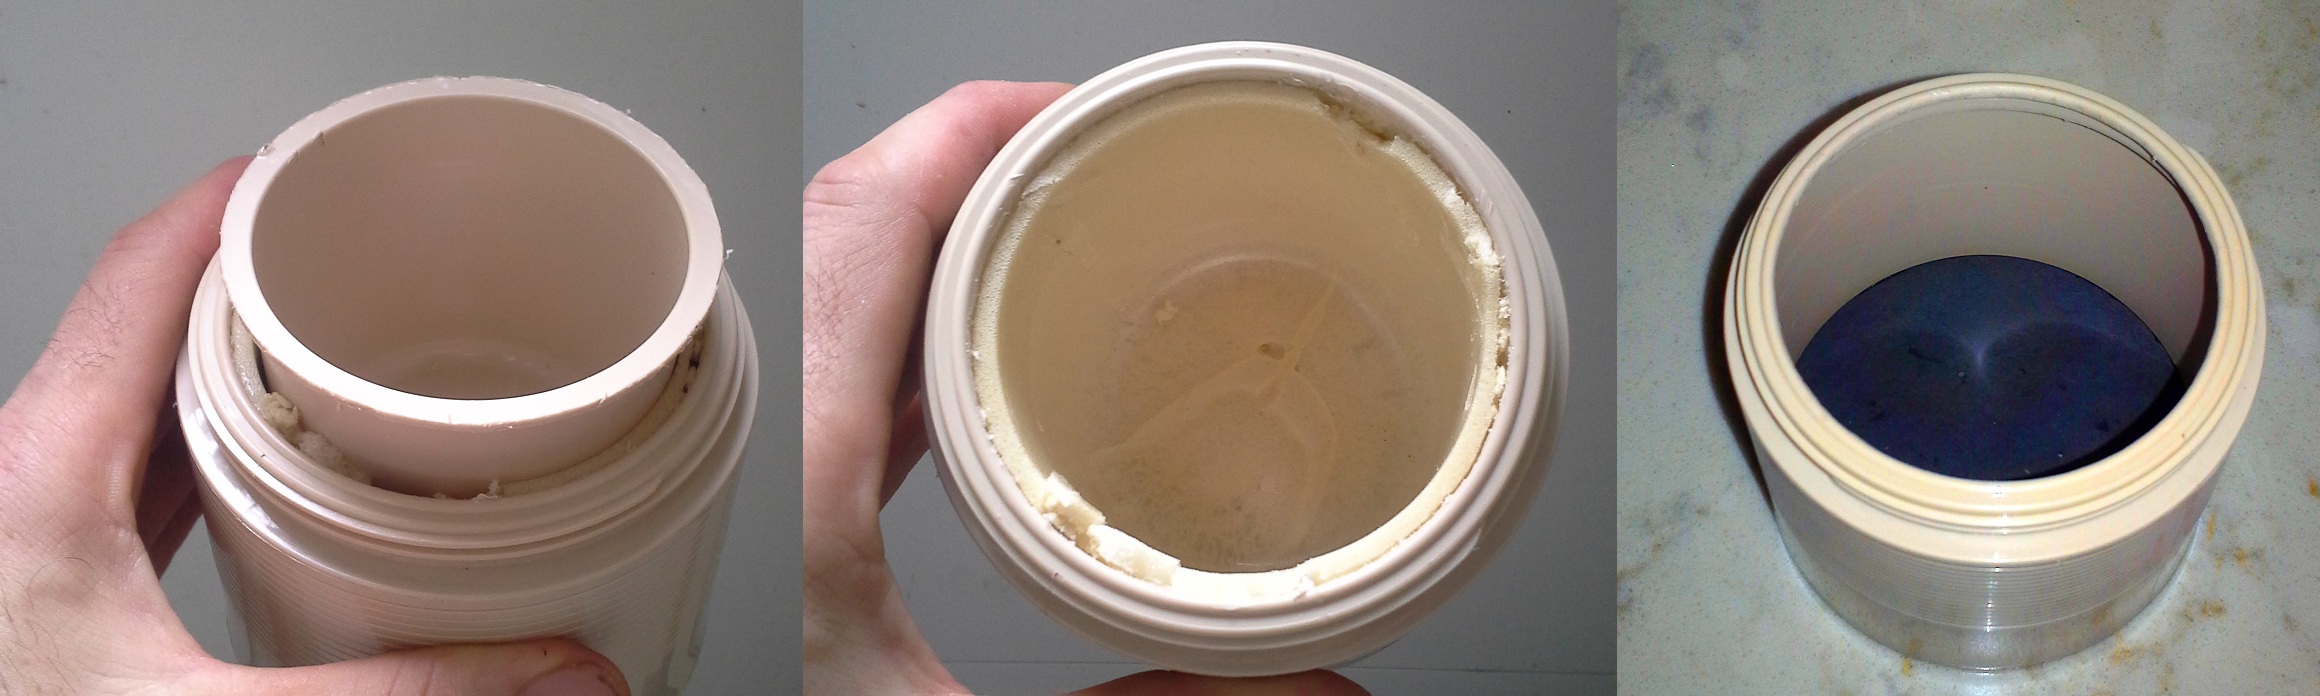
Inner cup:
2.62” inner diameter; 2.32” height
Area of circle = π * (1.31*1.31) = 5.39 in2
Volume of cylinder = 5.39 * 2.32 = 12.5 in3 = ~6.9 fl oz (US)
Outer cup:
3.77” ID; 2.86” height
A=π * (1.885*1.885=3.55) = 11.16 in2
V= 11.16 * 2.86 = 31.9 in3 = ~17.7 fl oz (US)
I had forgotten how crazy the surface area/volume relationship was…I would never have expected that by gutting this jar, I was going to more than double its capacity. Your eyes can deceive you, indeed! Now, I have over two cups of storage to think about, which starts to give me some serious options! Currently, I’m leaning towards some kind of obscure grain for a starchy filler, as 2 cups could easily make for multiple servings on the trail.
Now all that’s left is to give it a proper GFFA-weathering paintjob, and maybe add a couple subtle greeblies onto the lid. But for now, it’ll do.
Researching, crafting, and writing this site takes a lot of time and energy. If you’ve enjoyed reading, have learned something from this post, or will use it as inspiration for a future project, please consider supporting my work with a small donation below! Thank you!
Make a one-time donation
Make a monthly donation
Choose an amount (US dollars only – unfortunately, I cannot currently accept Republic credits 😉
Your contribution is greatly appreciated and will help me continue to keep this blog ad-free!
(Alternately, you can support my work via ko-fi as well.)
Your contribution is greatly appreciated and will help me continue to keep this blog ad-free!
(Alternately, you can support my work via ko-fi as well.)

One thought on “Applied geometry: Star Wars style”